Mainboard replacement#
Summary#
See also
Downloadthe video
Mainboard disassembly#
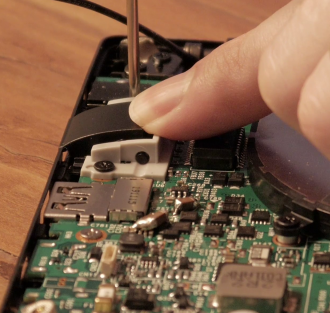
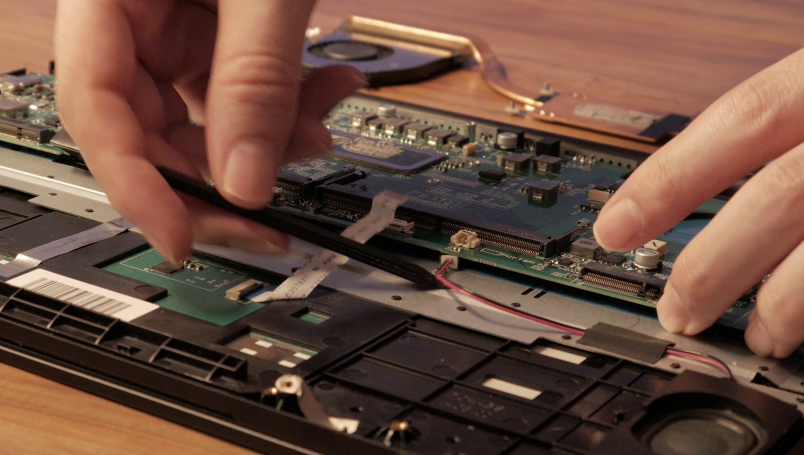
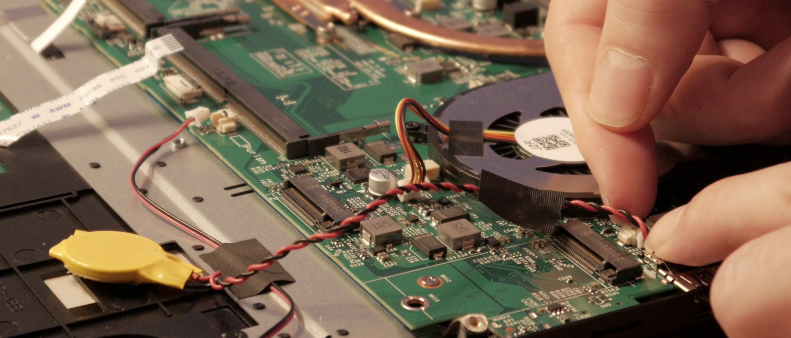
Pull up the tape holding down the BIOS battery and remove it.
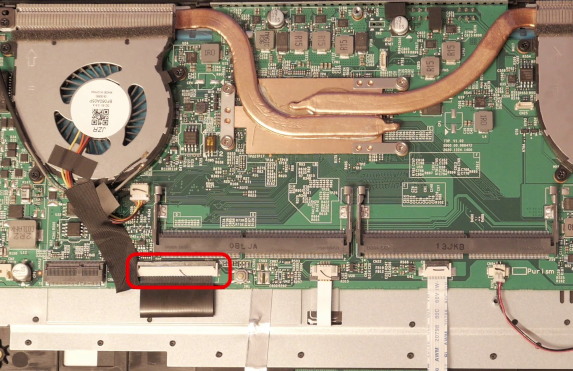
Disconnect the keyboard by pulling up on this black tab and removing the ribbon cable.
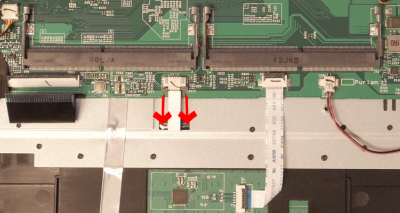
Push these black tabs towards the ribbon cable, then disconnect them to detach the keyboard backlight.
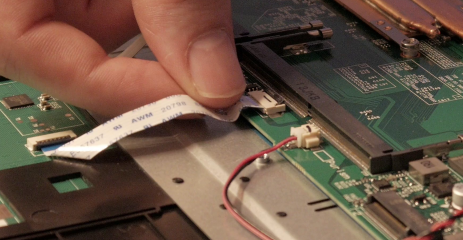
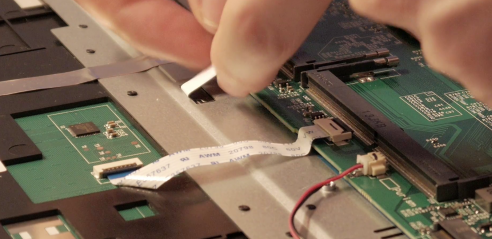
Similar to the keyboard, the trackpad connection is removed by lifting the black tab and pulling out the ribbon cable.
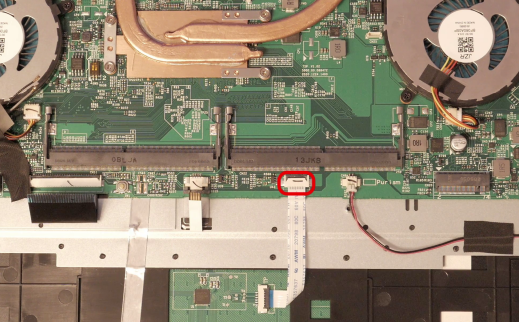
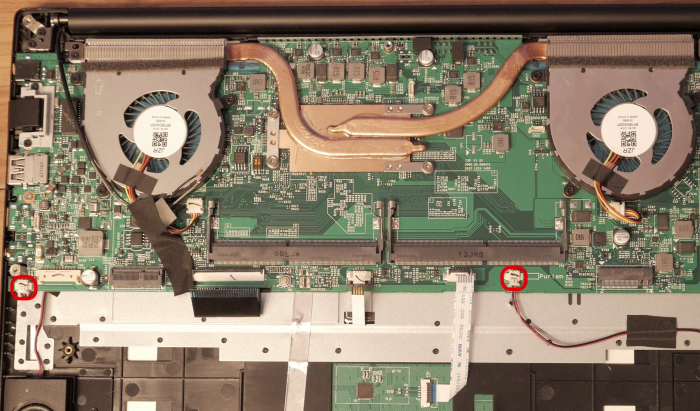
Remove both speaker connections by pulling the connector directly outward from the socket, toward the direciton of the cable.
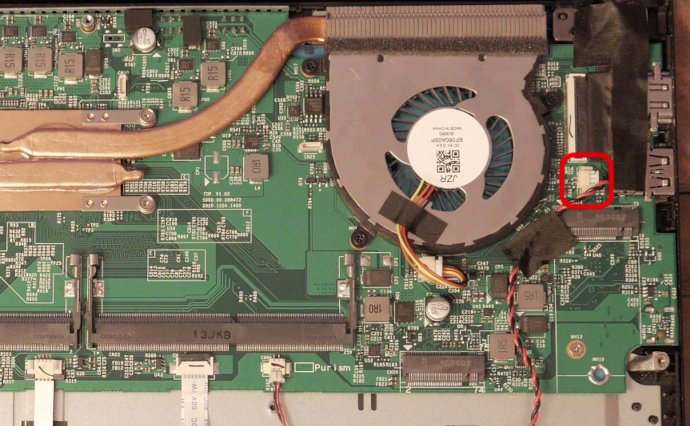
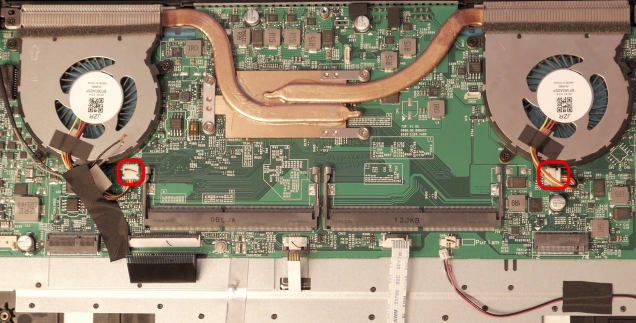
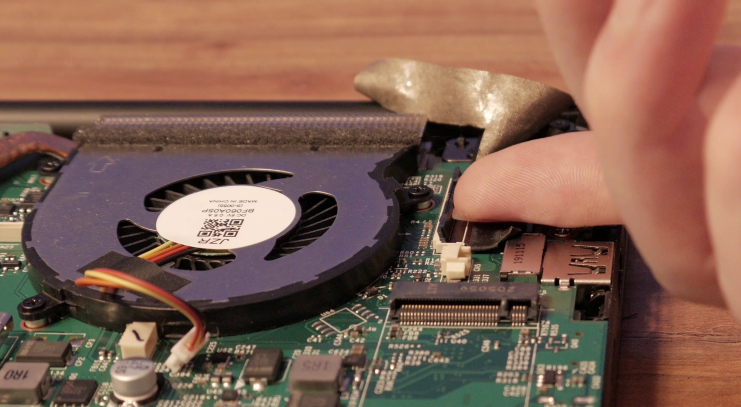
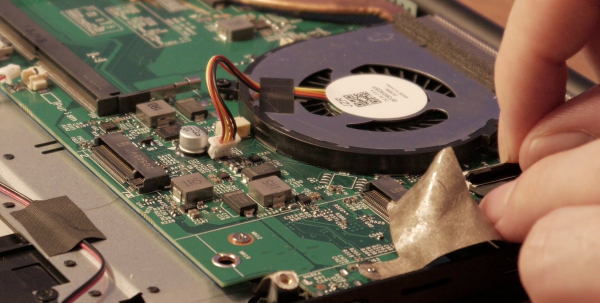
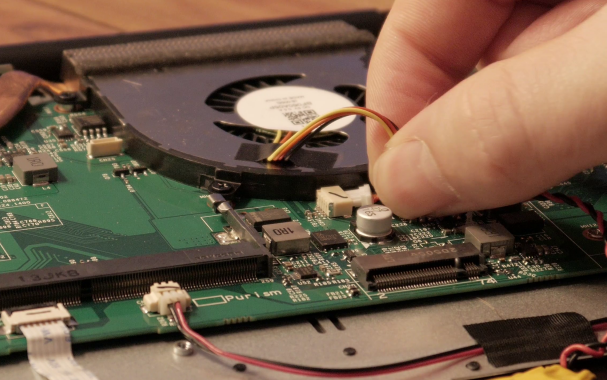
Disconnect the CPU fans in a the same way as the speaker connectors.
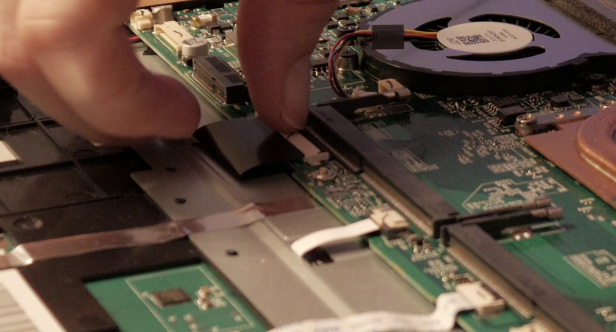
Pull up the tape around the display connector.
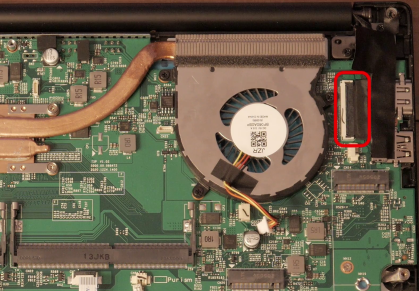
Lift the black tab and remove the display cable.
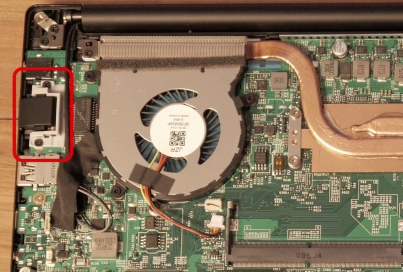
Remove the Ethernet port by removing two screws.
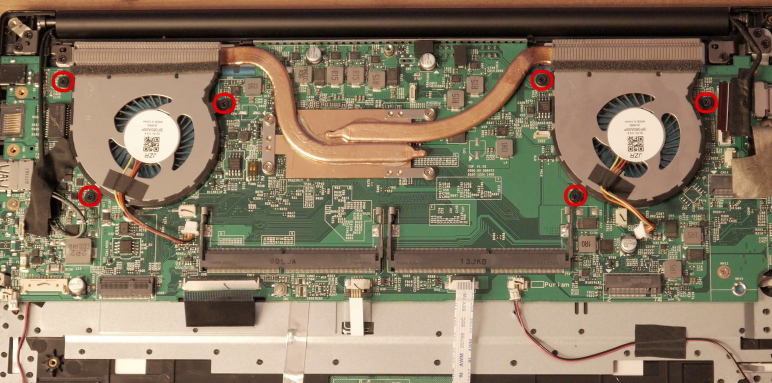
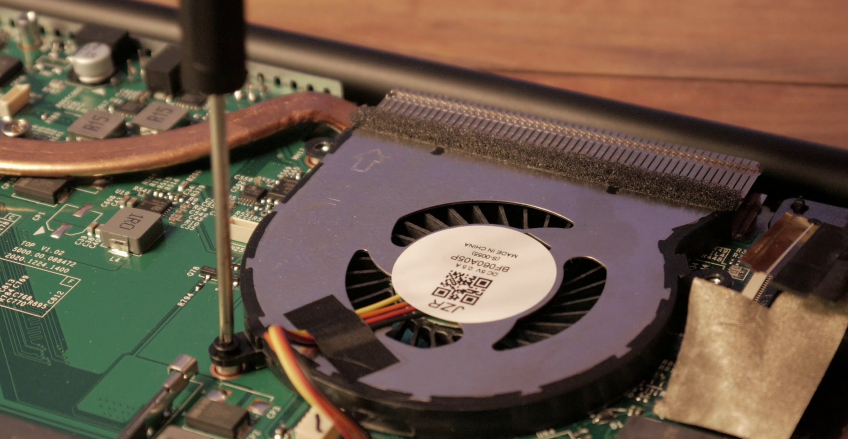
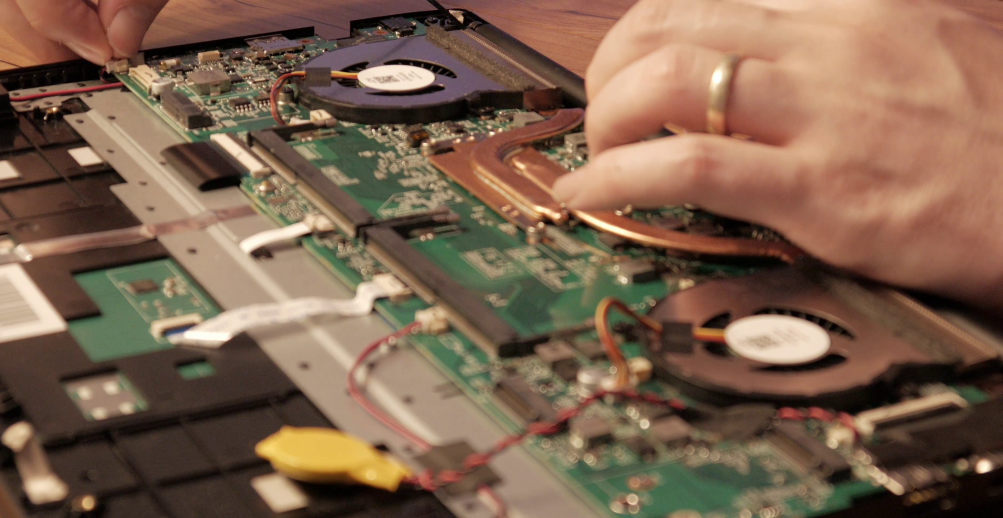
Unscrew both fans.
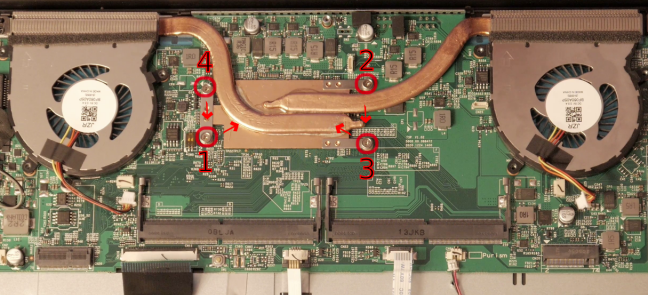
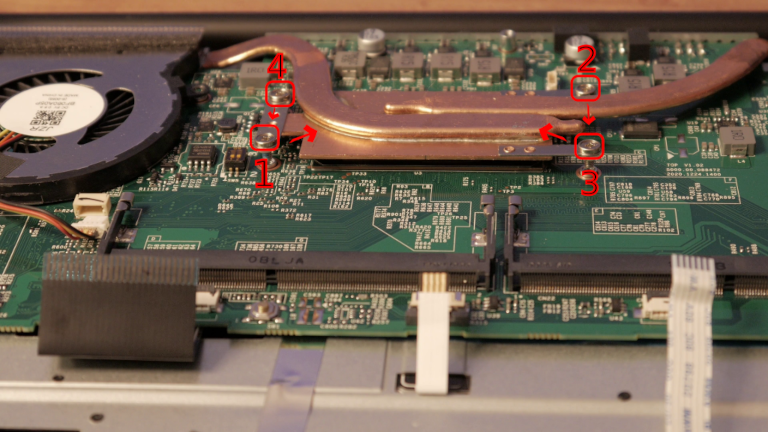
Unscrew each of the four heatsink screws by a quarter turn in a criss-cross pattern until the CPU heatsink is freed. This pattern helps equalize pressure on the CPU and GPU.
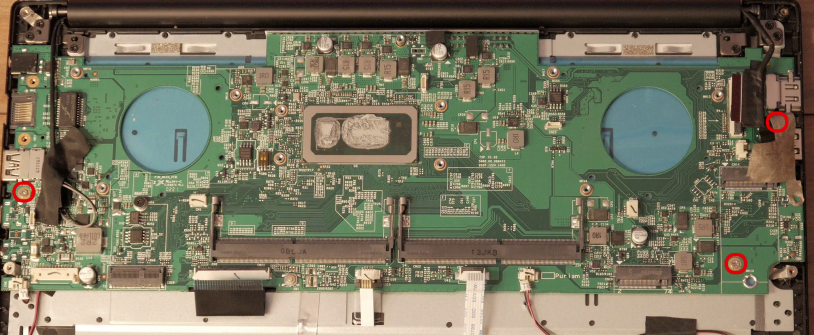
Remove these three screws to detach the mainboard from the chassis.
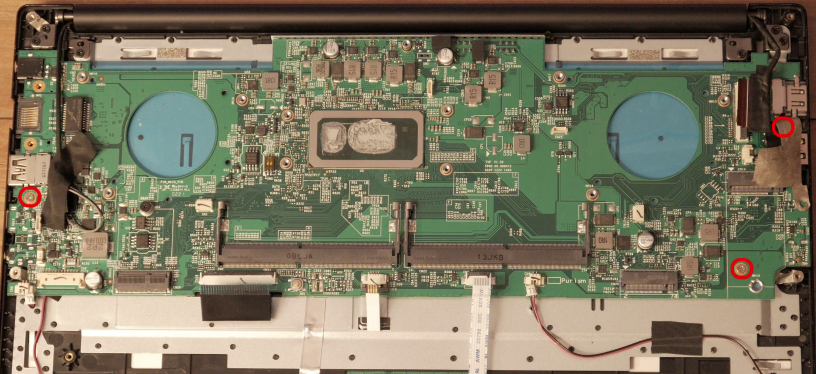
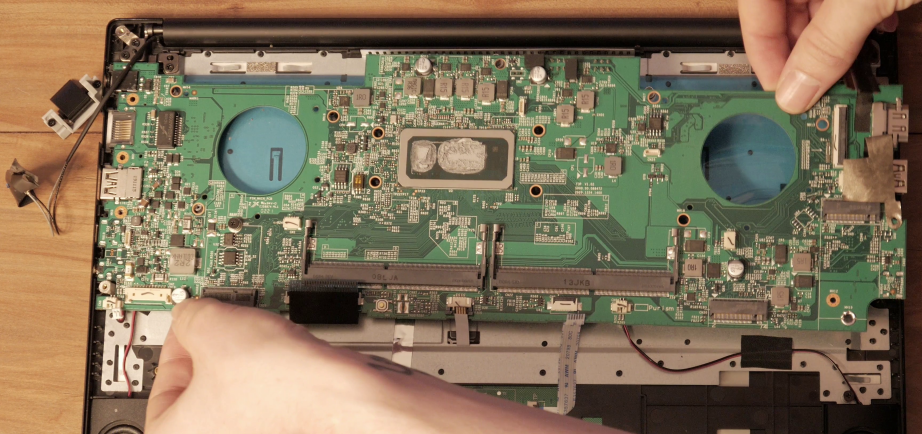
Carefully remove the mainboard from the chassis.
Mainboard reassembly#
Carefully place the motherboard into the chassis. Ensure the mainboard is not covering any loose cables.
With the board laying flat, screw-down its three screws.
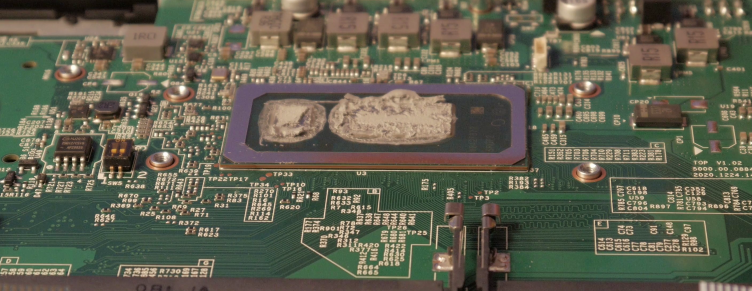
Wipe off the thermal compound from the CPU. Apply fresh thermal compound using the manufacturer’s instructions. Use the image as a guide.
Carefully align the heatsink and use the same criss-cross pattern to secure the CPU to the mainboard. Make sure to use small turns and do not over-tighten these.
Screw down the heatsink fans.
Reattach the monitor display cable and flatten the tape.
Connect the onboard BIOS battery.
Reattach the speakers.
Carefully insert and clamp down the trackpad ribbon cable.
Connect the keyboard backlight.
Connect the keyboard.
Connect the CPU heatsink fans.
Reattach the Ethernet port.