Getting started#
Materials#
Component |
Required? |
Notes |
|---|---|---|
nano-SIM card [1] |
No, but… |
Required if you wish to place and receive phone calls/texts/data |
microSD card |
No |
Useful for removable storage expansion |
3FF format (micro-SIM sized) smart card |
No |
Useful for hardware-encrypted communication |
Prepare the device#
The following steps are recommended prior to ever powering on the device on for the first time.
Install nano-SIM and microSD cards#
The phone accepts a nano-SIM card and a microSD card in the tray marked in the diagram below.
Ensure that the phone is fully powered off. [2]
Place the phone on a flat, hard, level surface with the screen facing down.
Insert the point of the extraction tool into the hole at the end of the tray, perpendicular to the side of the phone.

Push the point firmly into the hole until the tray ejects.
Gently pull the tray out of the slot.
Insert the nano-SIM card into the tray on the edge of the phone, as shown in the diagram below. The SIM card receptacle is keyed for proper card alignment. Verify that the SIM card notch is properly oriented with the key on the tray.
Optional: Insert a microSD card into the vacant slot.

Carefully and gently push the tray back into the socket at a perpendicular angle. The tray will click into the socket when fully closed. The tray cap will sit flush with the edge of the chassis.
Install (optional) OpenPGP card#
If an OpenPGP card was purchased, now would be a good time to install it into the device. However, an OpenPGP card may be installed at any time in the future. See this guide for installation details.
Charge the device#
The device must be adequately charged before use.

Plug the charger into a mains power supply.
Place the device on a flat, hard, level surface.
Connect the device to the charger via the USB cable provided The indicator light should appear red to show that the device is charging. It will turn off again when the device is fully charged. [3]
Allow to sufficiently charge (recommendation: > 1 hour for new batteries).
Unplug the charger from the power outlet.
Unplug the USB cable from the device.
Power on the device#
Ensure that the screen is visible.
Locate the power button.

Press and hold down the power button until the indicator light appears green. The screen will illuminate shortly afterward.
See also
See the Troubleshooting section if the device fails to power on.
Unlock the encrypted disk#
The user will be prompted for a disk encryption passphrase to unlock the encrypted system once the device is powered on.
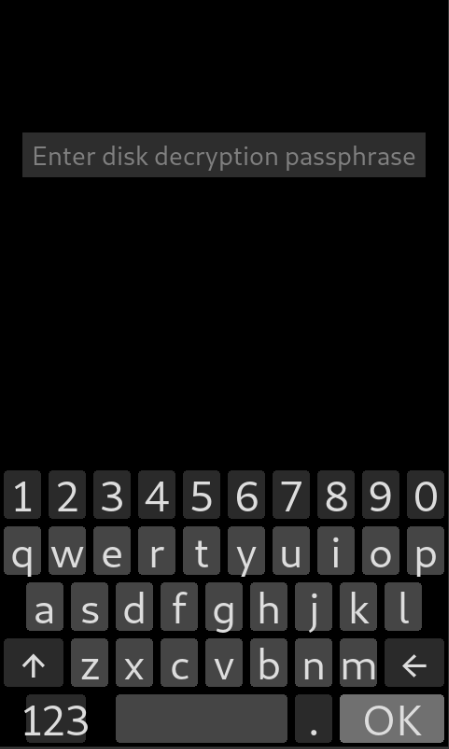
Enter your passcode (
123456) using the numeric keypad.Press the OK button.
Tip
It is wise to change the disk encryption passphrase after successfully logging in.
Unlock the screen#
The device greets you with a locked screen. If the screen has switched off, briefly press the power button to switch it on again.
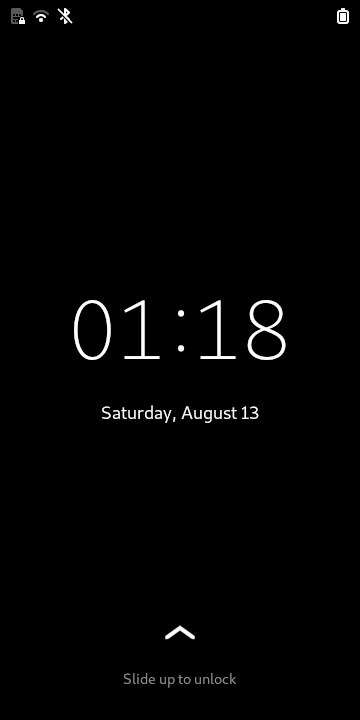
A locked screen should now be visible. To unlock the screen:
Swipe up from the bottom of the screen to reveal the passcode entry screen.
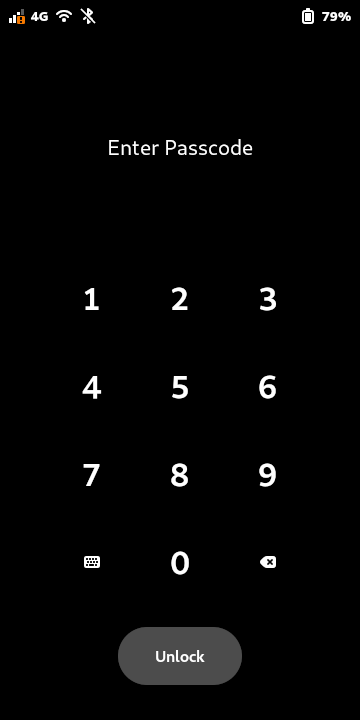
Enter your passcode (
123456) using the numeric keypad, then press the Unlock button.
Tip
It is wise to change the user passcode after successfully logging in.
A Welcome screen will appear if this is the first time the device has been unlocked. Otherwise, the phone will display the app drawer.