Disk management#
GNOME Disks#
Manage partitions, check disk status and more with GNOME Disks.
GNOME Disks is provided via the gnome-disk-utility package.
Visual walkthrough#
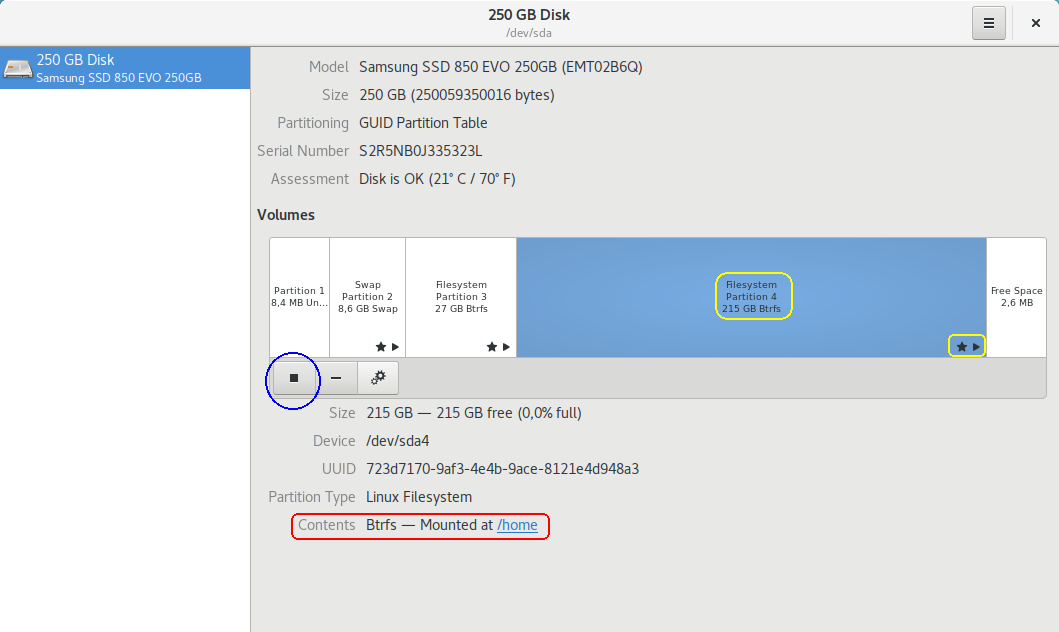
All block devices are listed along the left sidebar.
Red: block device, model, and total capacity
Dark blue: disk model
Orange: disk total capacity
Green: Menu button
Yellow: Filesystem type and partition capacity
Check disk health#
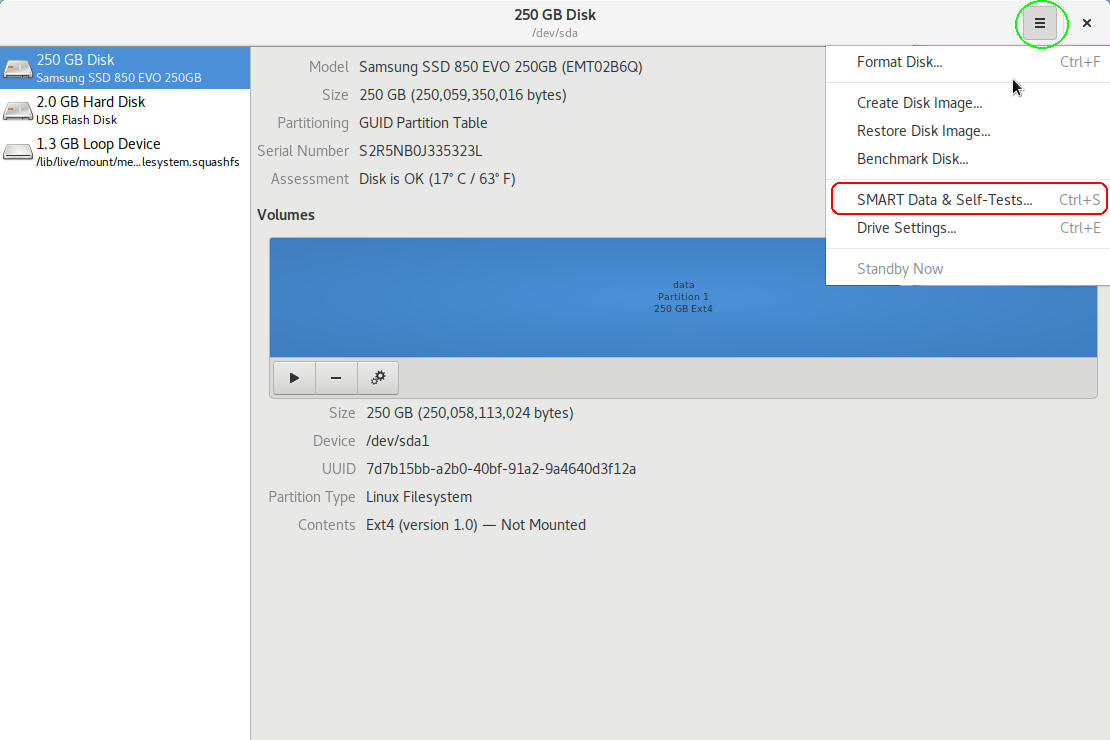
Check the SMART info of your disk by accessing it from a menu:
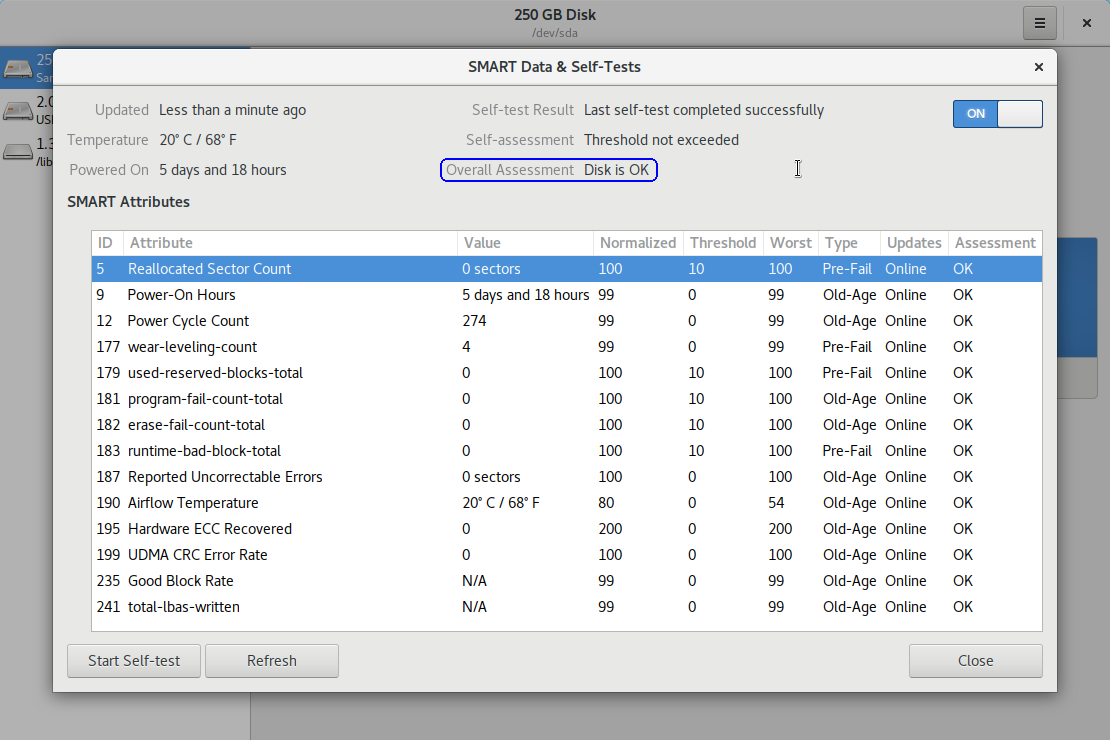
Your disk is working perfectly if all attributes have OK status:
Manage partitions#
Create partitions#
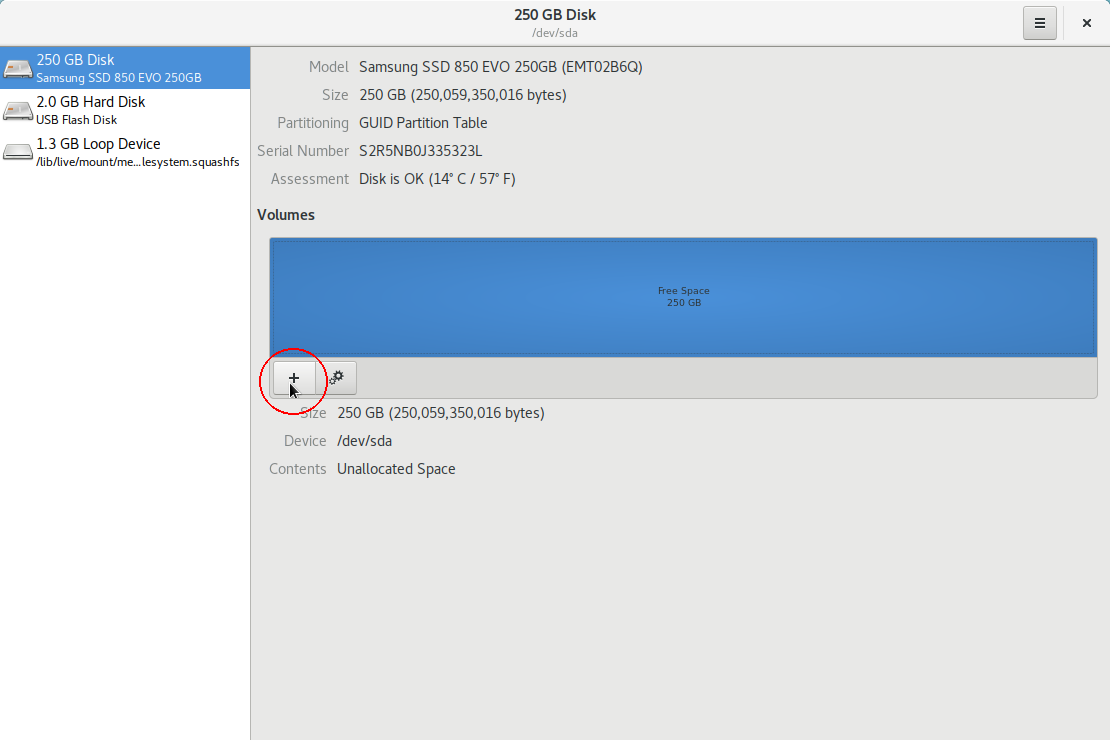
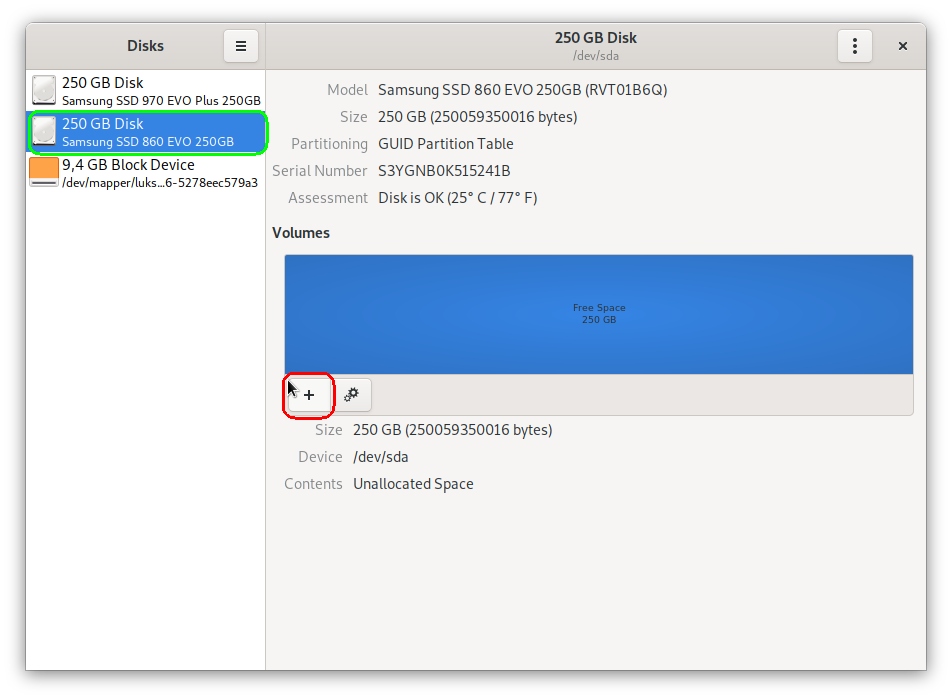
Create partition by clicking the disk’s empty space and clicking the + button:
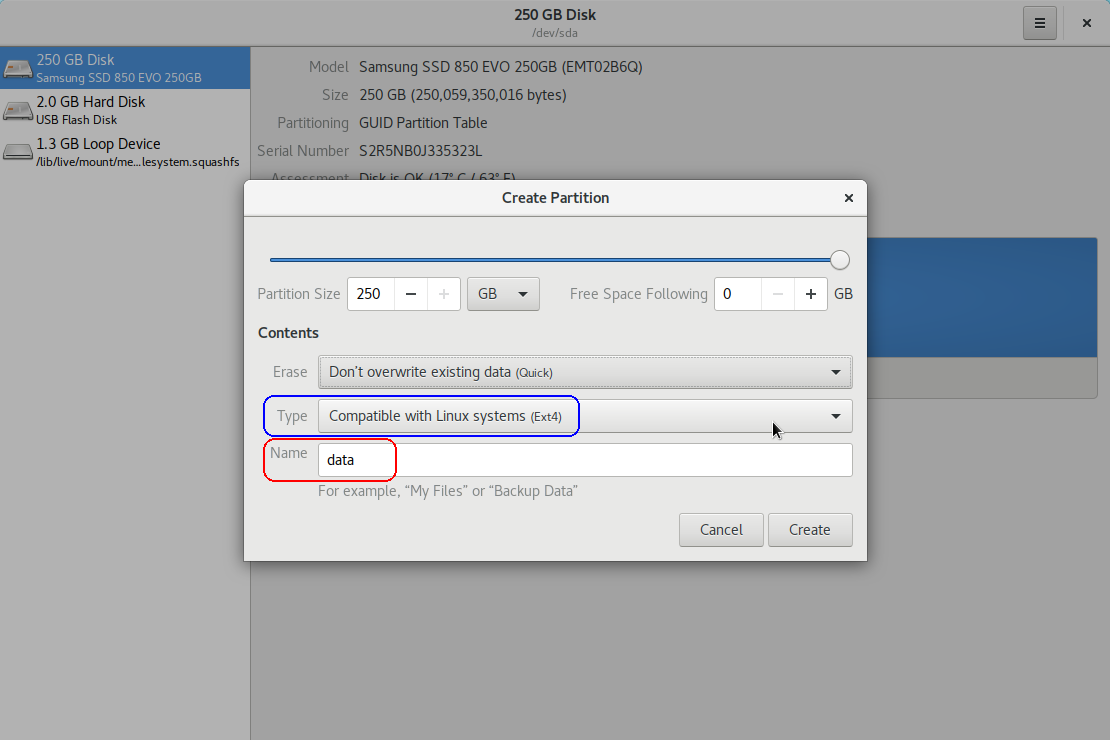
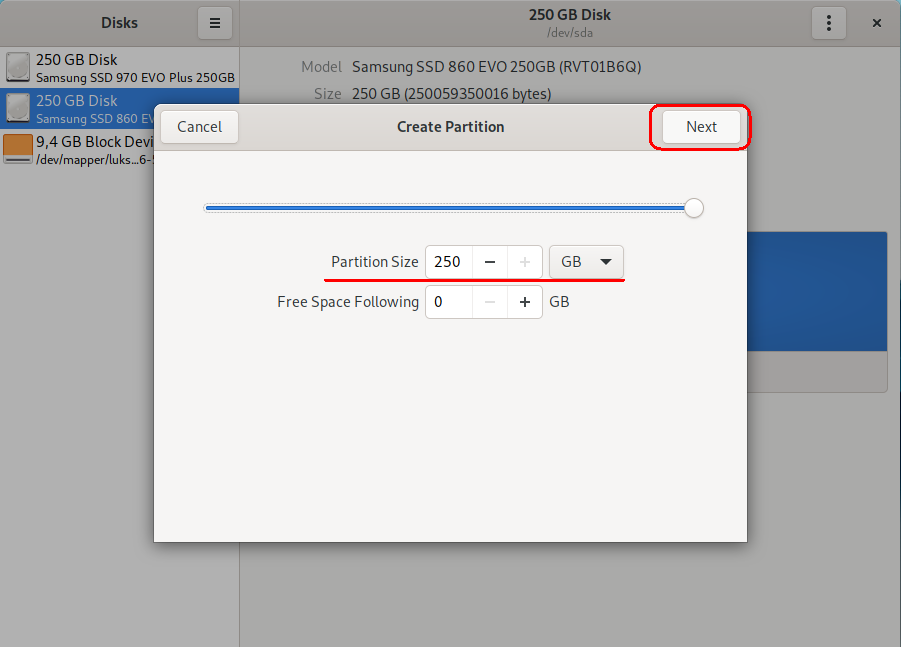
Specify the size of the partition, select the file system and assign some name to it.
In this example, we will use this disk for data storage, hence the name data:
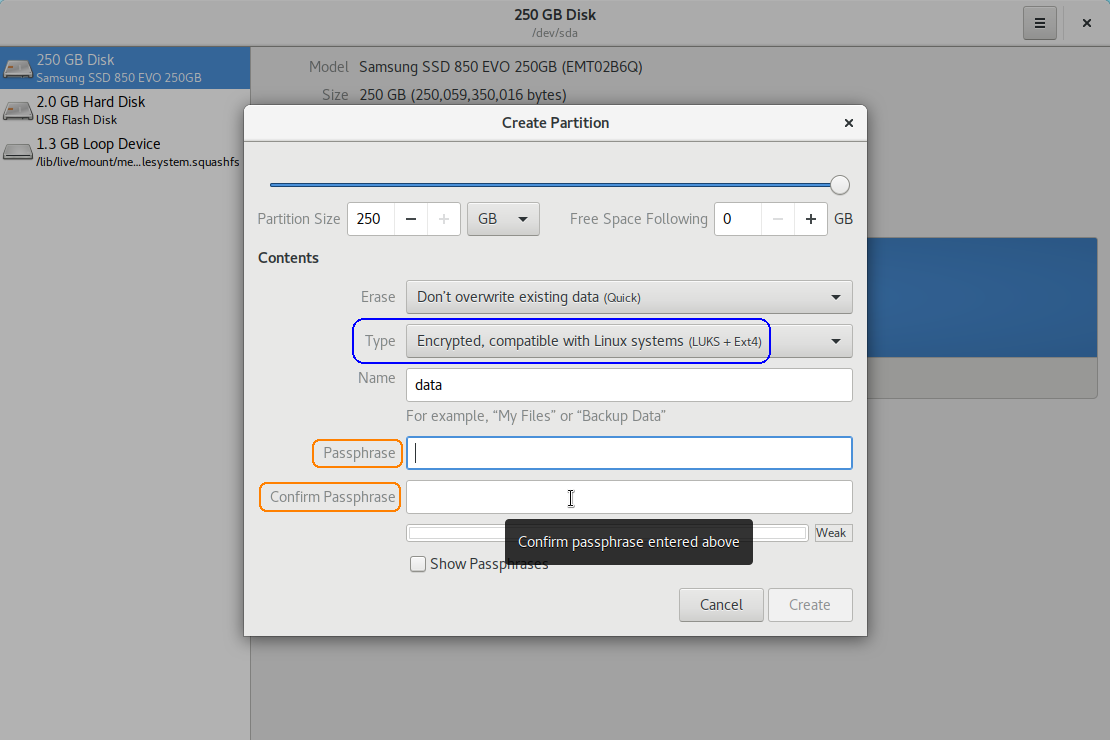
If you want to encrypt the partition, select the appropriate partition type and specify the password.
Warning
If you ever forget the password, your data will be unrecoverable!
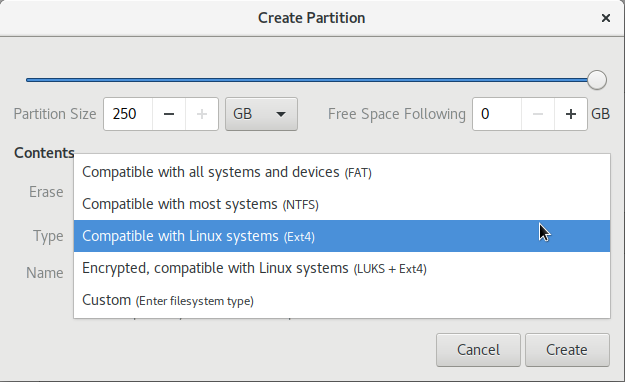
You can also select other partition filesystems, but this should be done if you are experienced user and you know what you are doing:
Mount options#
Several partition options will become available once a partition has been created.
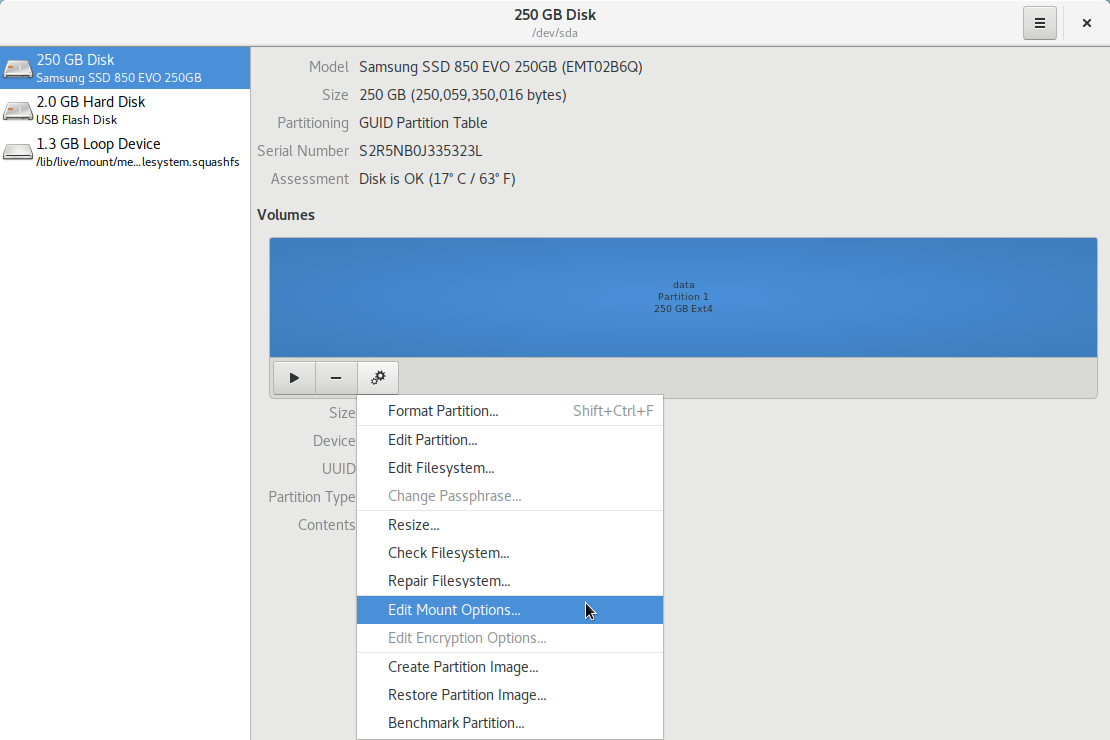
Click the options button to see available options:
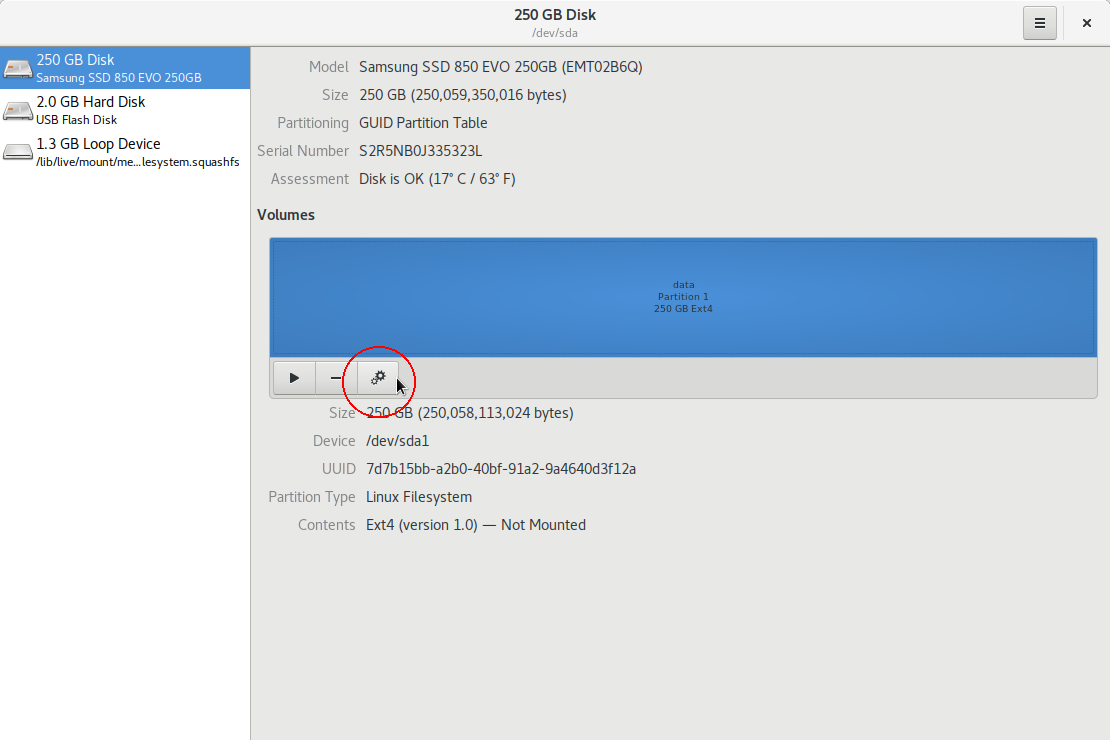
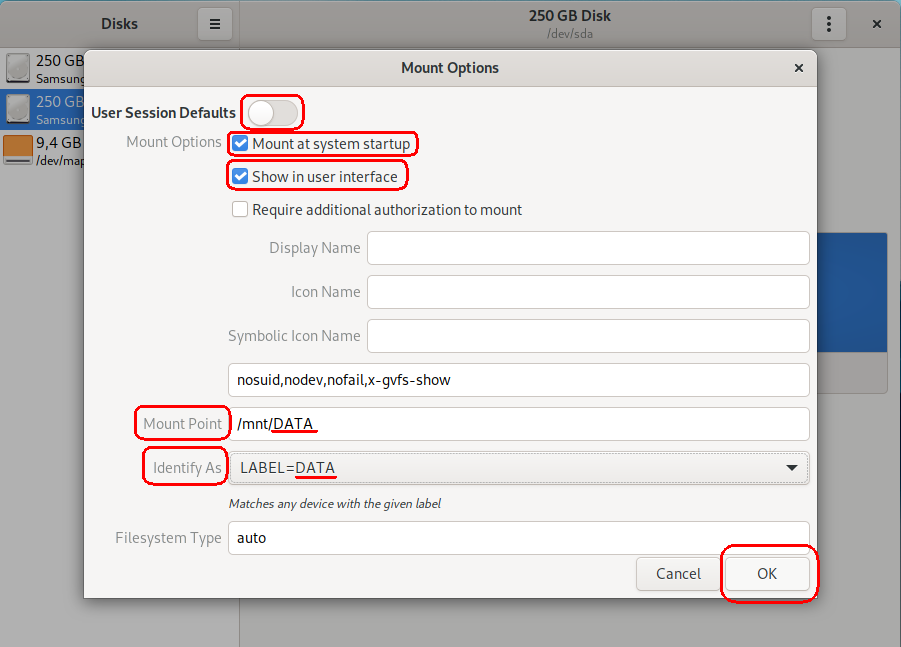
A context menu will appear with relatively self-explanatory menu options. The most important for you will be how and where to mount your partition:
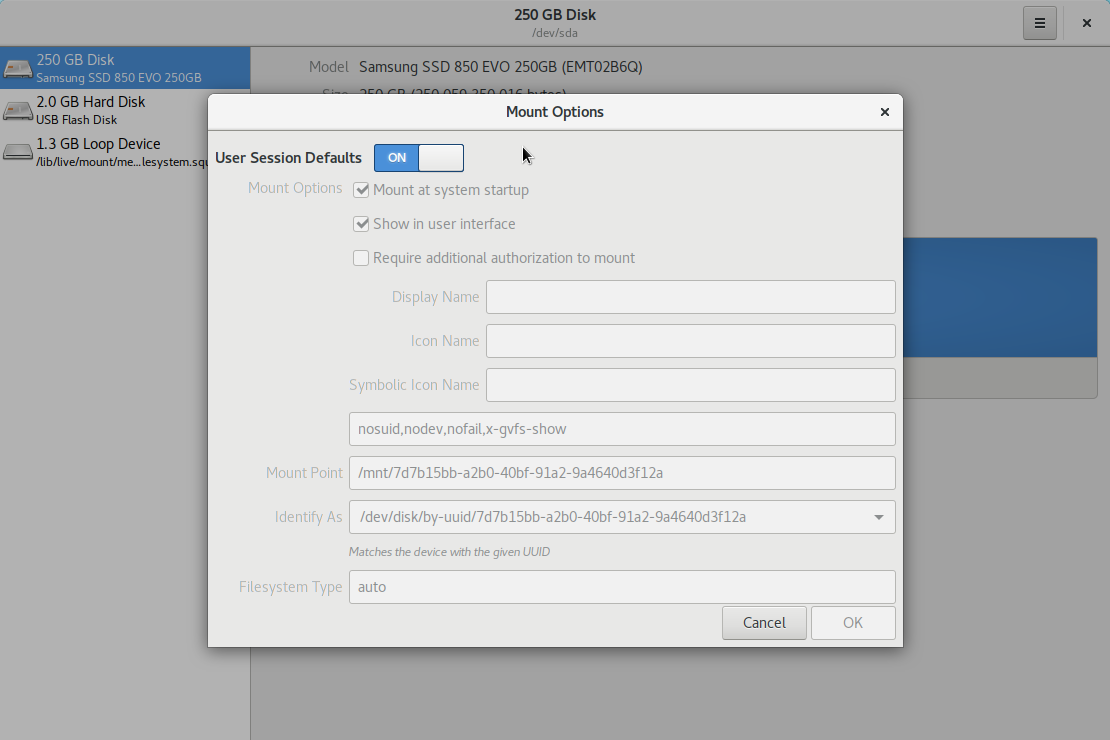
Click the Edit Mount Options… button.
User Session Defaults may be toggled off if a custom partition mounting configuration is needed. For example, you can specify Mount Point, for example:
/mnt/mydata.Tip
This directory must exist prior to mounting the partition.
Remove partitions#
You can remove a partition by simply selecting it and clicking the remove button:

Warning
Be absolutely sure you selected the device to format. Removing a partition will destroy all its data!
Mount partitions#
Mount a partition by selecting it and clicking the mount button:
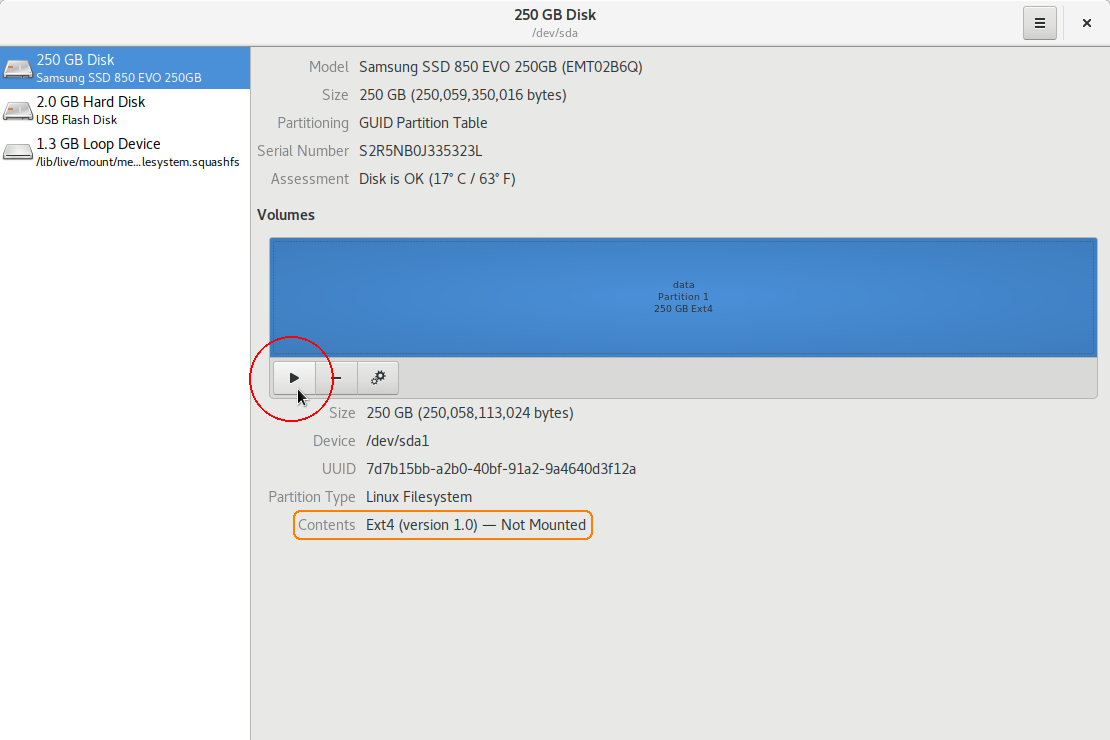
By default, partitions you create will be automatically mounted if you haven’t set them up differently.
Mounted partition can be unmounted by clicking the unmount button (blue circle), but only if none of the programs are accessing the files on the partition. (This means you cannot unmount your system and home partitions.) You can also see in what directory the partition is mounted (red circle):
Add secondary disks#
GNOME Disks can easily provision new block devices. If an additional disk is installed, one or more partitions must be created on it prior to its use.
This guide describes how to format a secondary internal disk and configure it as data/media storage.
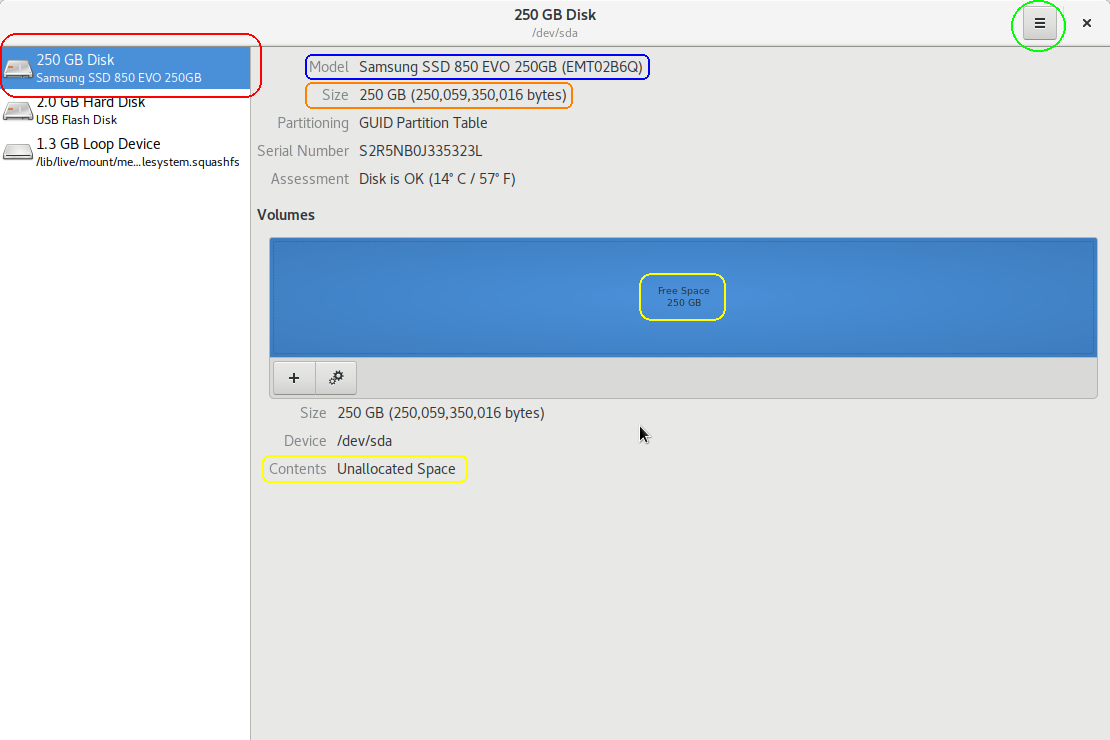
Identify the block device to configure. Check its name, model, size, and ensure the disk is already empty (does not contain any data, yellow circle) before proceeding.
Click the
 (kebab menu) icon and then Format:
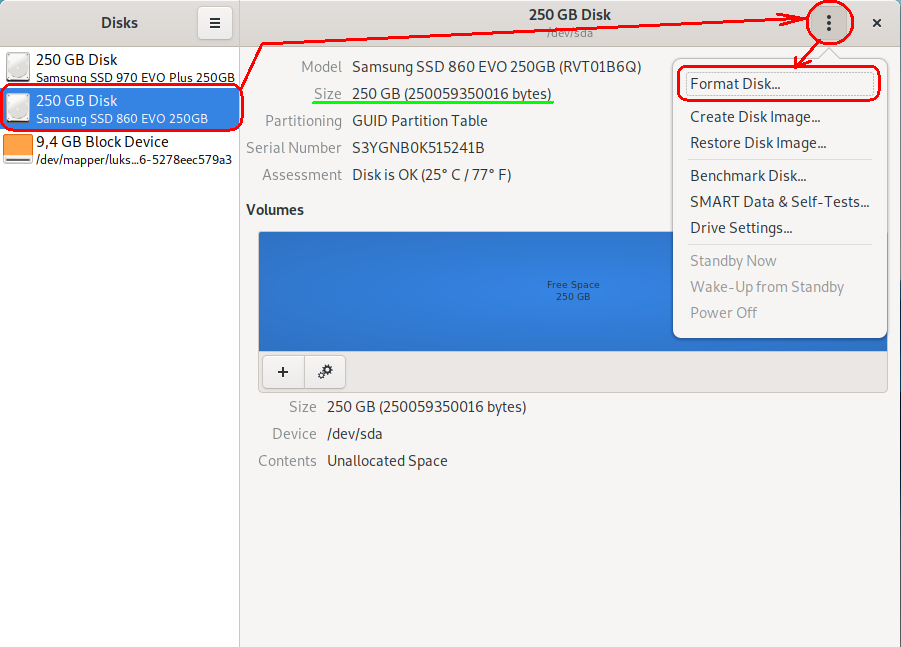
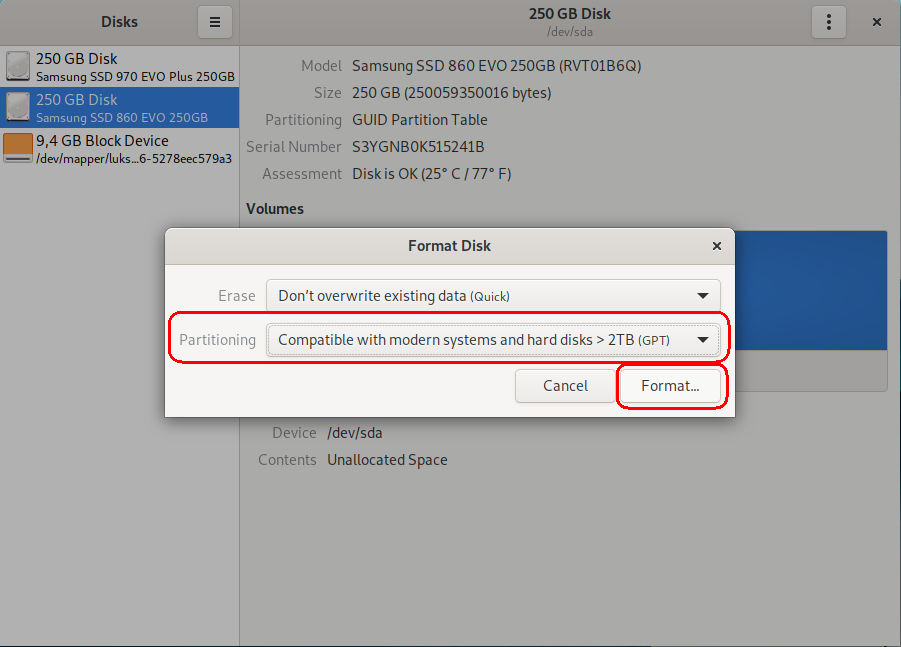
Select the GPT partition type, then click the Format… button. This will create a new disk partition table:
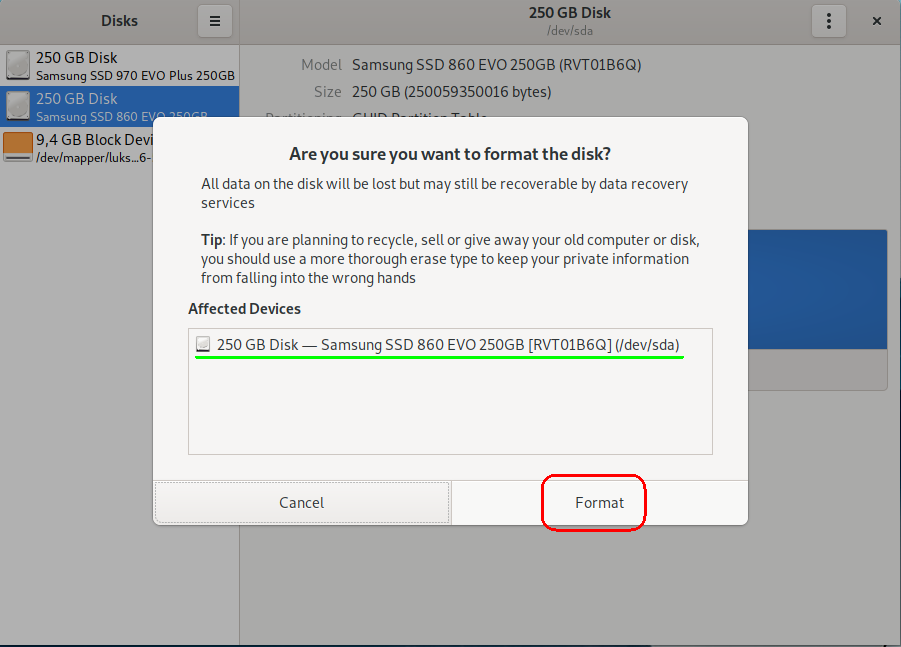
Once again verify that you are formatting the correct disk and proceed with the process:
When the formatting process is complete, click the + button to create a new partition:
For this example, the maximum capacity is selected. Click Next:
Type volume name (for example: “DATA”, “Backup”, “Media”), select the
ext4type and click the Create button: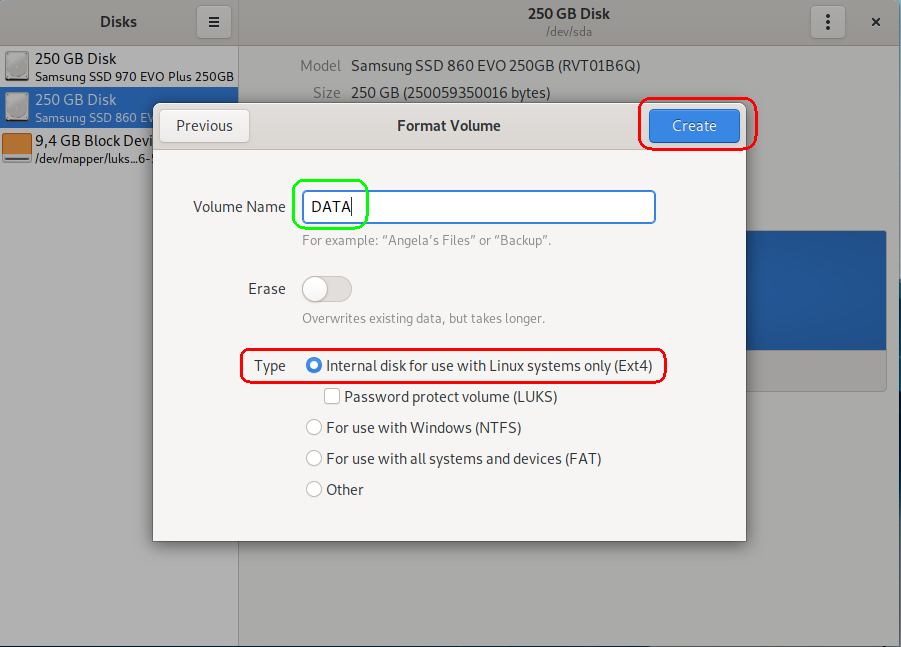
Note
You can set up encryption for the partition at this point by checking Password protect volume (LUKS) option. This fully encrypts the partition volume; this will require you to type a disk decryption password each time the computer is started to unlock it.
Click on the gears icon.
Select Edit Mount Options… from the context menu.
Toggle off the “User Session Defaults” option.
Select Mount at system startup and Show in user interface check boxes.
Choose a mount point. For example, if you previously used “Media” for the volume name, use the same name here. (It must be one word!)
Select the same for the Identify as field.
Leave
autoas the filesystem type.Click OK:
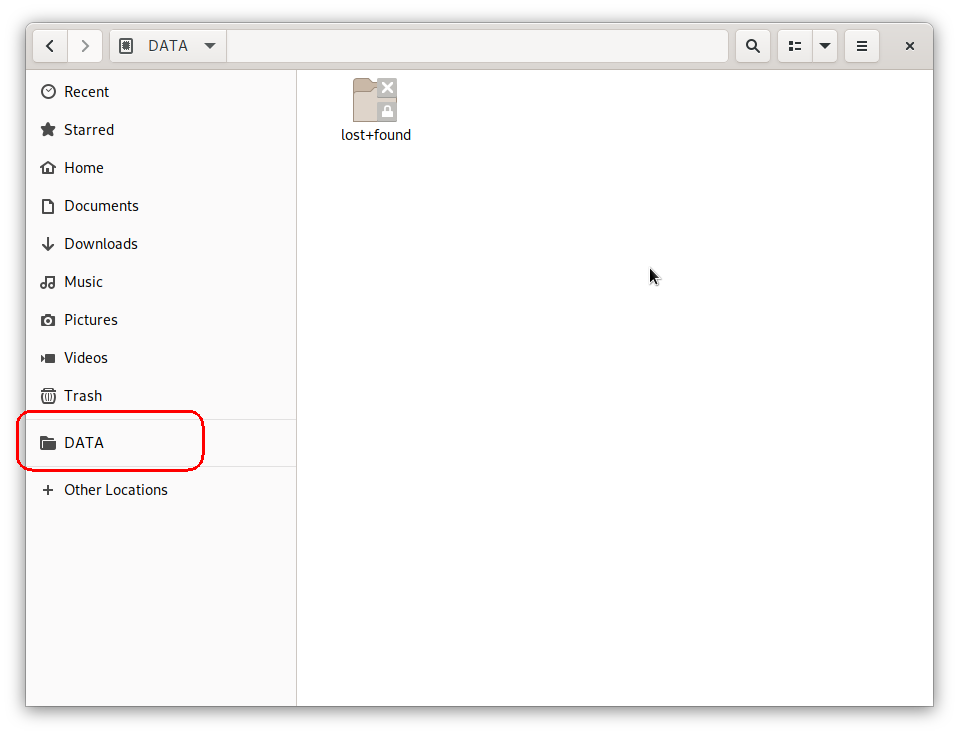
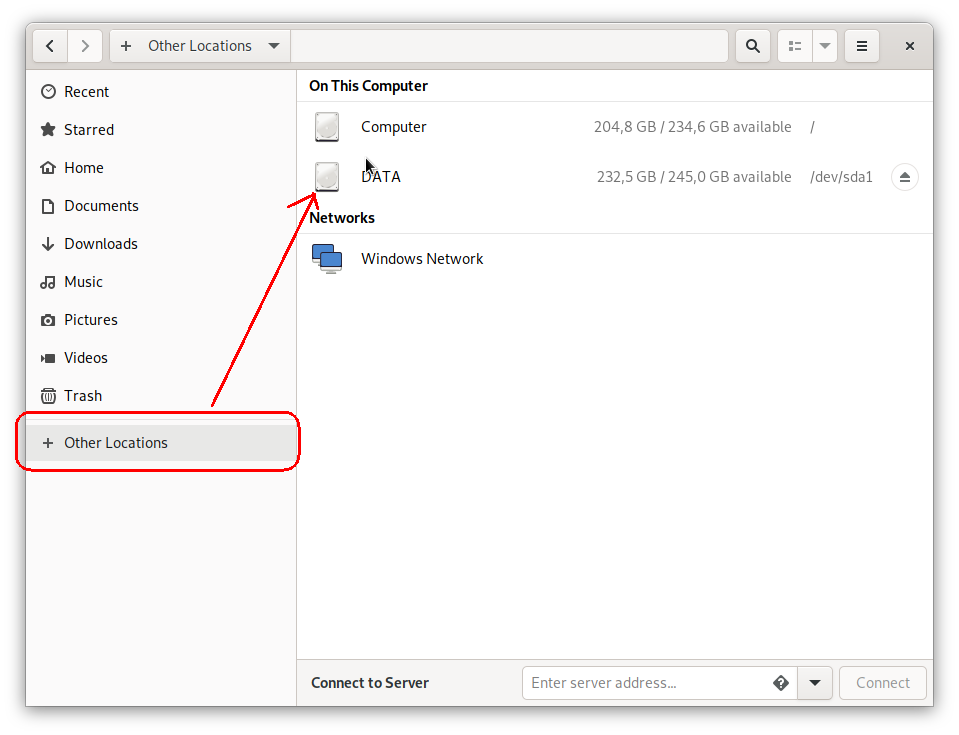
The disk should now be located in default file manager under “+Other Locations”, mounted and ready:
Open the storage volume. Right-click on an empty space, then select “Add bookmark”. The bookmark will appear in the left-side pane for easier access: