Install PureOS#
PureOS boot options#
Boot your system from the PureOS live installation medium.
Tip
If your device has PureBoot installed:
- Enter the PureBoot main menu
If PureBoot says “Automatic boot in 5 seconds unless interrupted by keypress…”, press the space bar to interrupt boot
If any errors appear during startup, select Continue to main menu
Select Options –>
Select Boot Options –>
Select USB Boot
Tip
If your device has coreboot+SeaBIOS installed:
When the splash screen appears, press Escape
Find your USB flash drive in the boot device list, and press the corresponding number key
Once the device that contains the installation media is booted, you will see the following boot options:
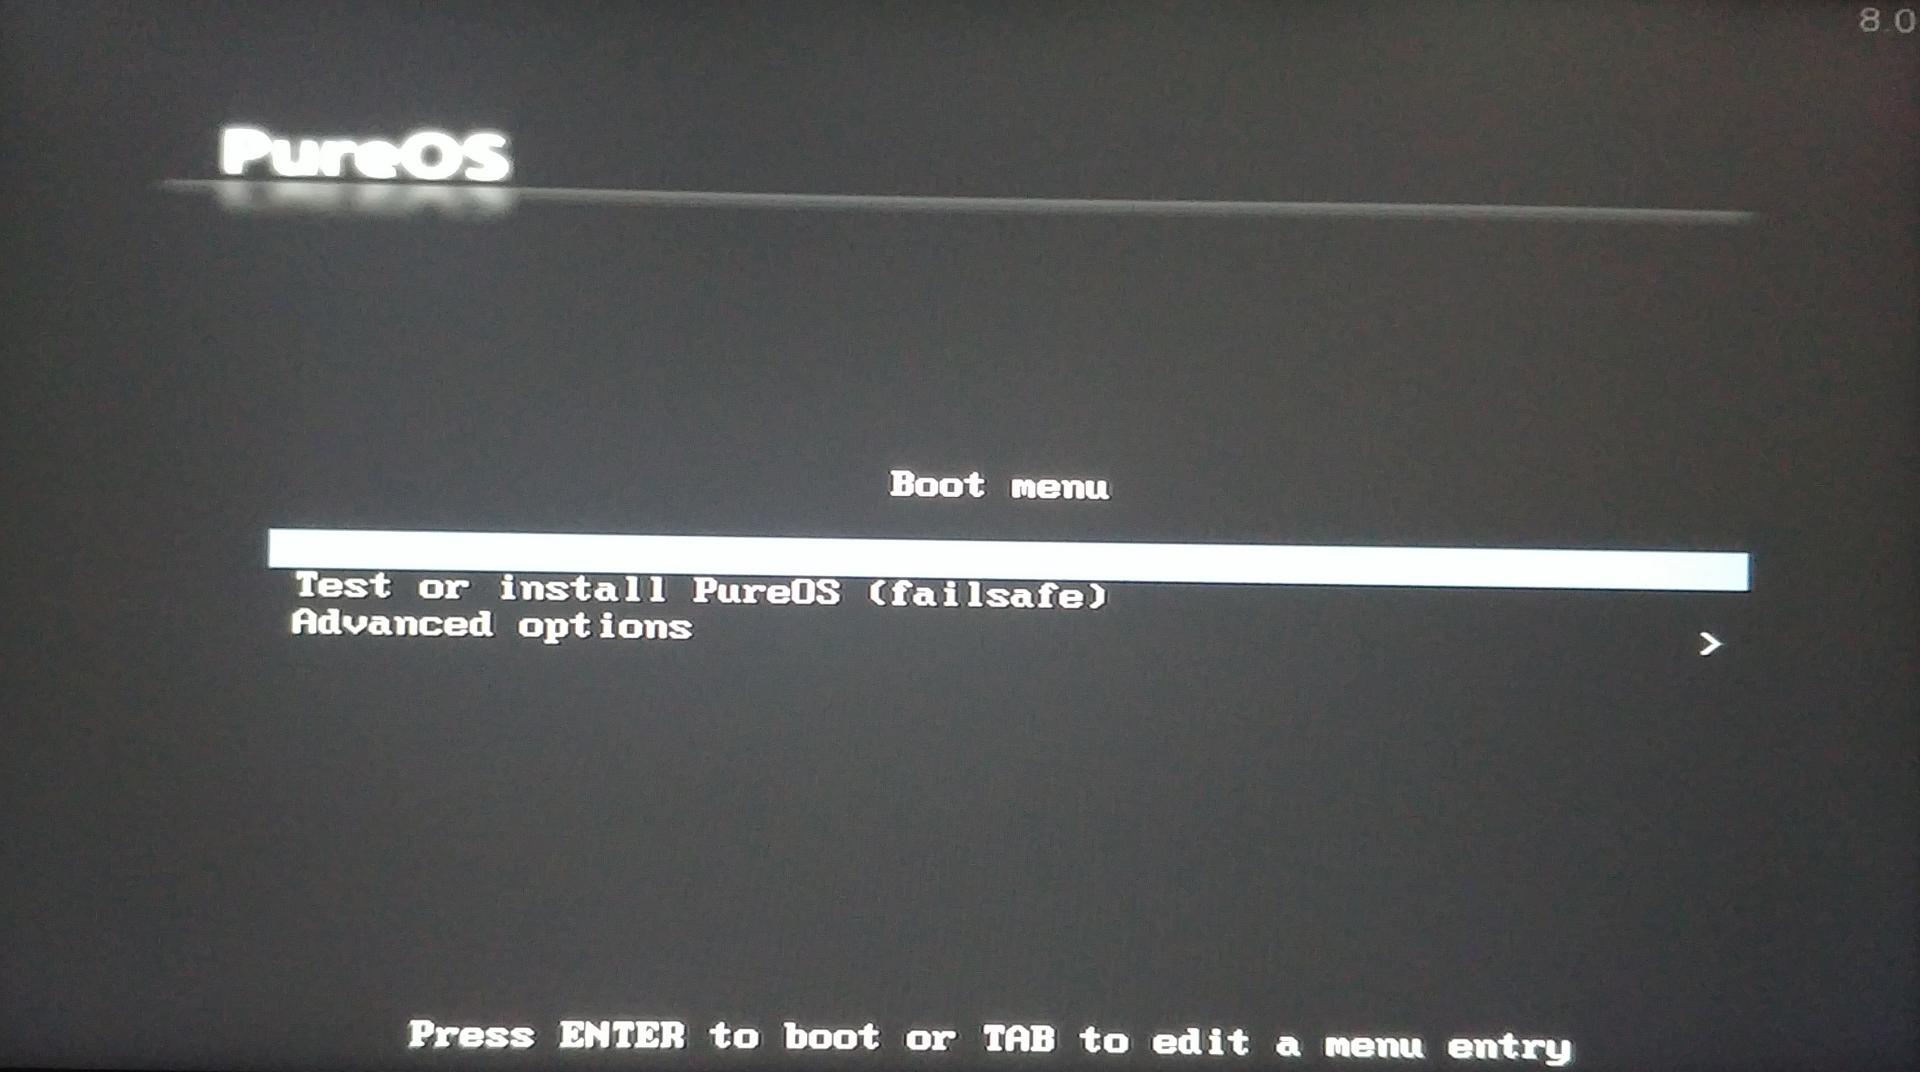
The options are:
- Test or install PureOS
Starts a live PureOS instance, where you can install the system using the Calamares installer
- Test or install PureOS (failsafe)
Starts live PureOS instance with safe boot options enabled
- Advanced Options
Hardware detection tool and memtest (memory testing tool)
Press Enter to boot the default (first) option.
See also
Troubleshooting: PureOS boot screen does not appear
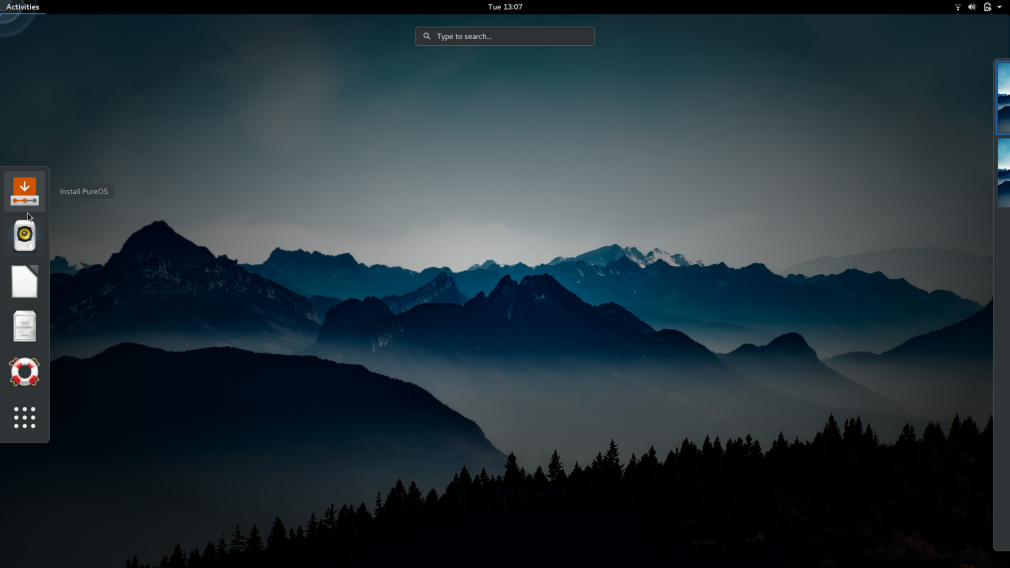
Install from a live system image#
When the desktop appears, follow the steps below to install PureOS.
Warning
If your disk is larger than 2 TB, you must follow Install PureOS with manual partitioning instead to partition the disk correctly.
Start the Calamares installer. Click Activities in the upper-left corner, then click Install PureOS.
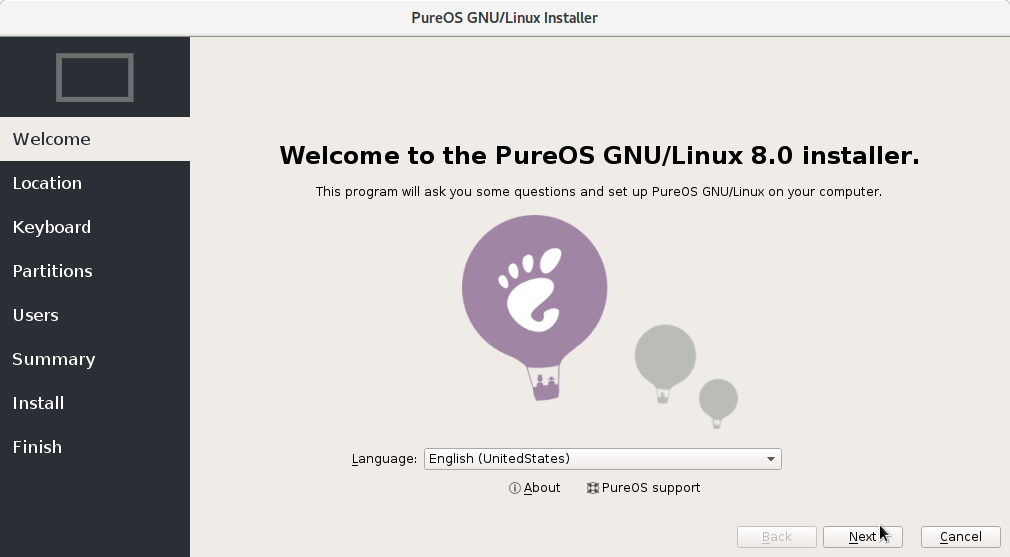
Ensure that you are connected to the power supply and the internet, and click Next:
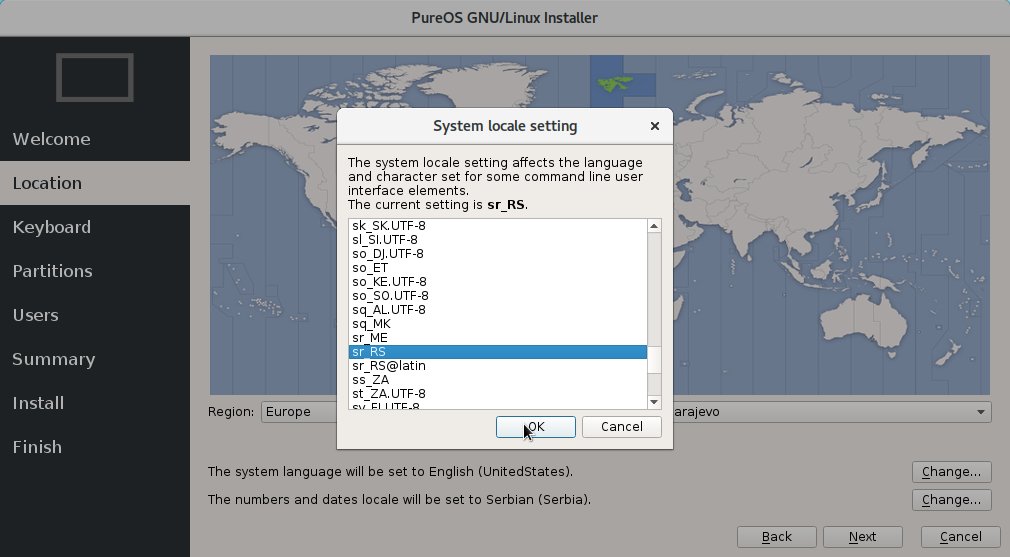
Choose your time zone, set the system language and number and date locale:
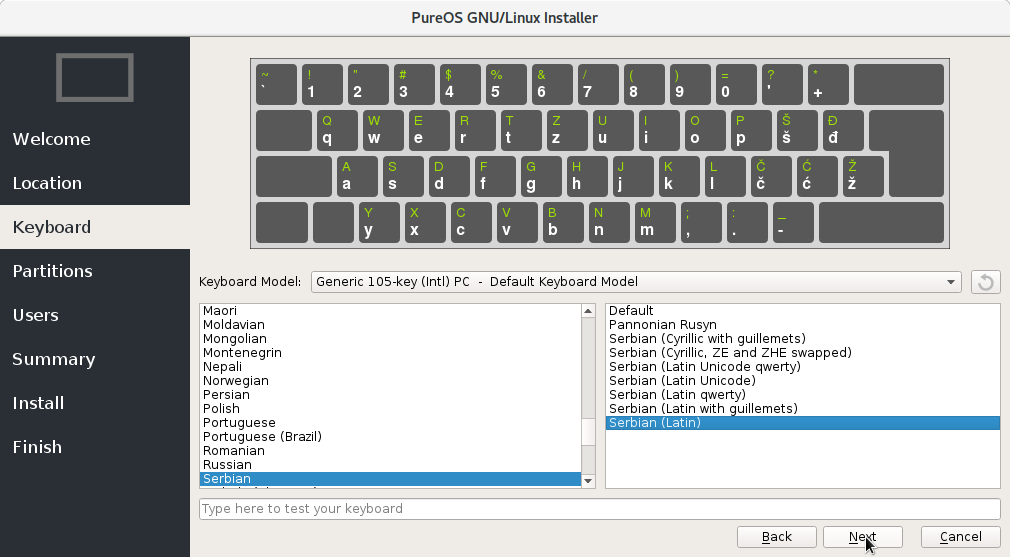
Select your keyboard layout:
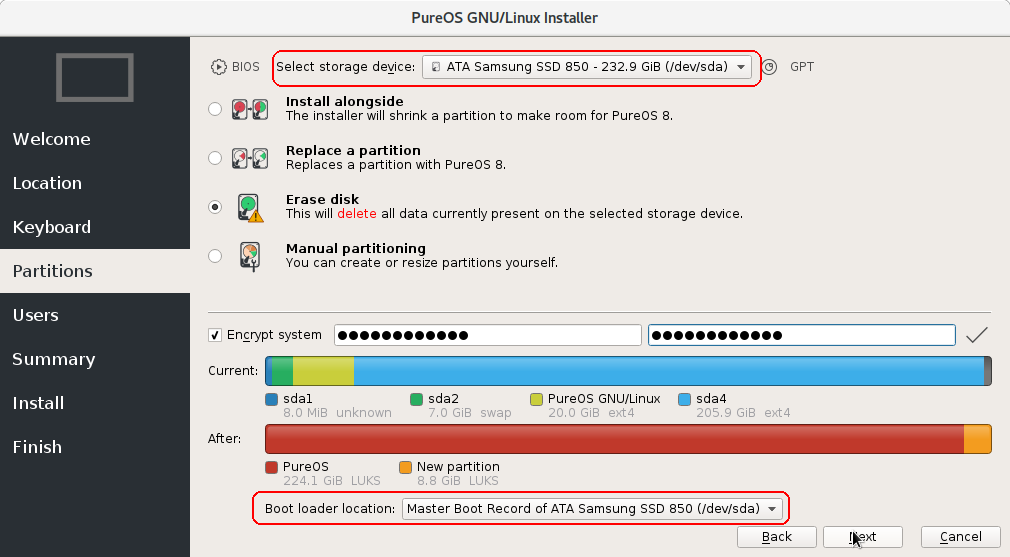
Configure partitioning: This guide assumes that your disk is blank. Choose automatic partitioning (Erase disk option), the installer will automatically partition your disk. Enter the password you wish to use for the full disk encryption. Leave it out if you do NOT want disk encryption.
Note
Make sure to select proper device to install to! See the options circled in red. Ignore if you only have one disk installed.
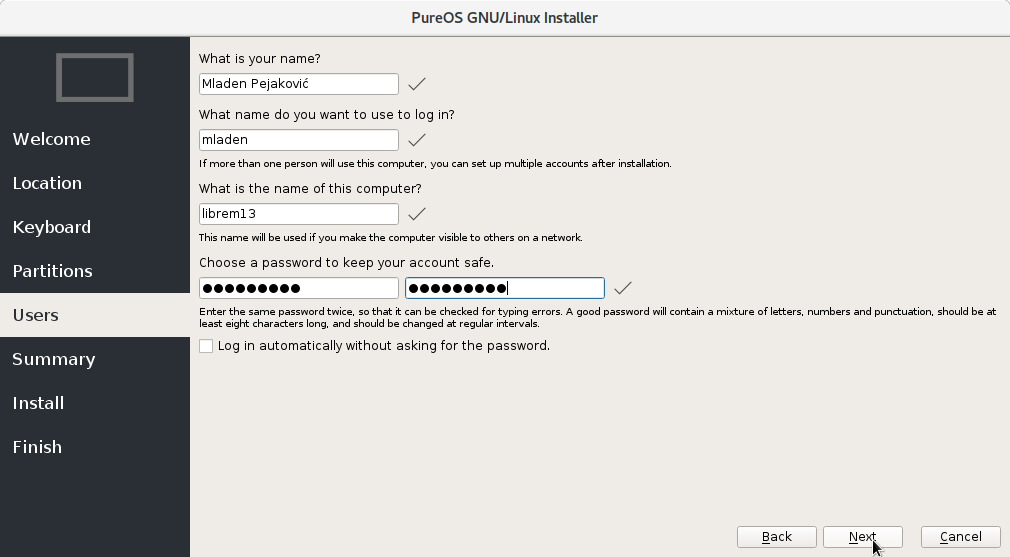
Create a user:
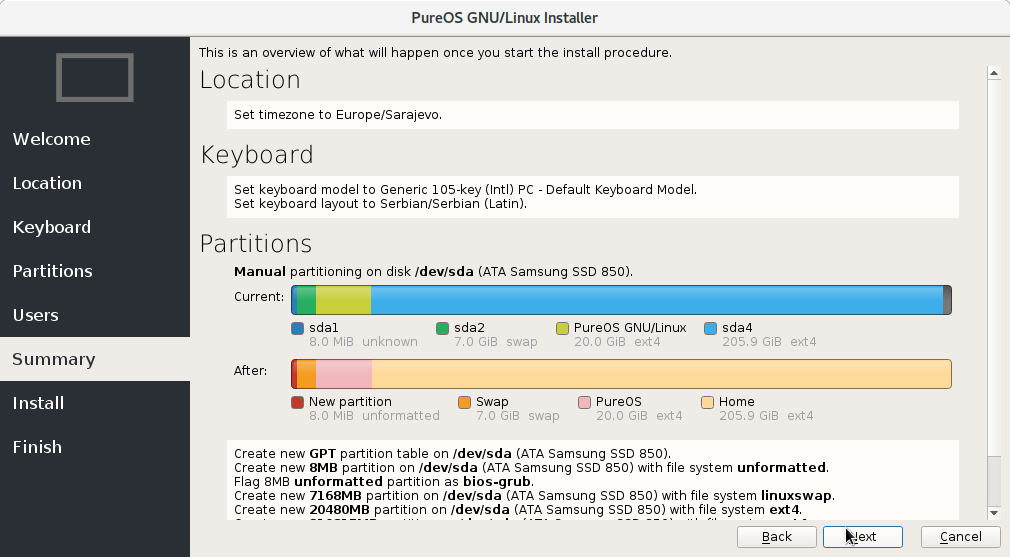
Review install instructions:
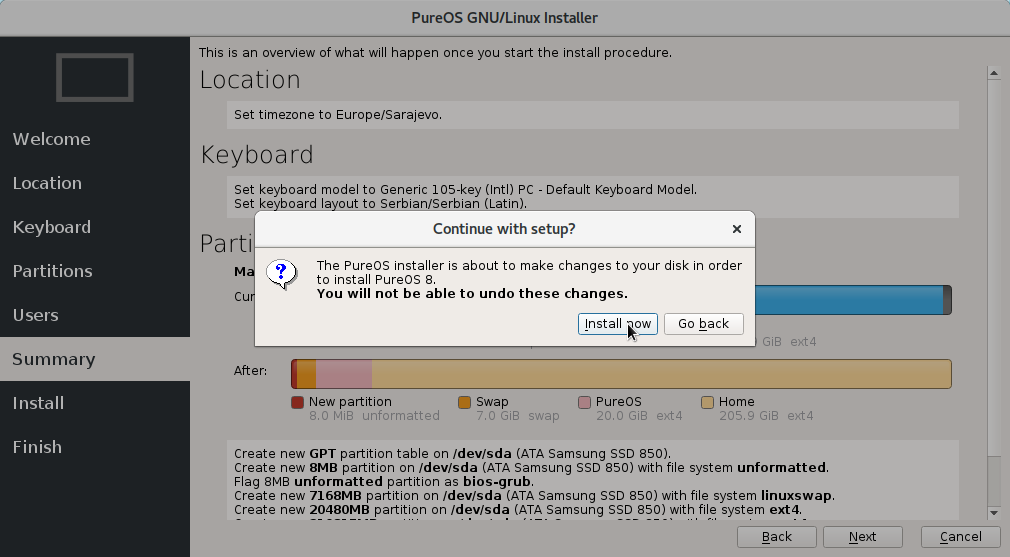
…and confirm the installation:
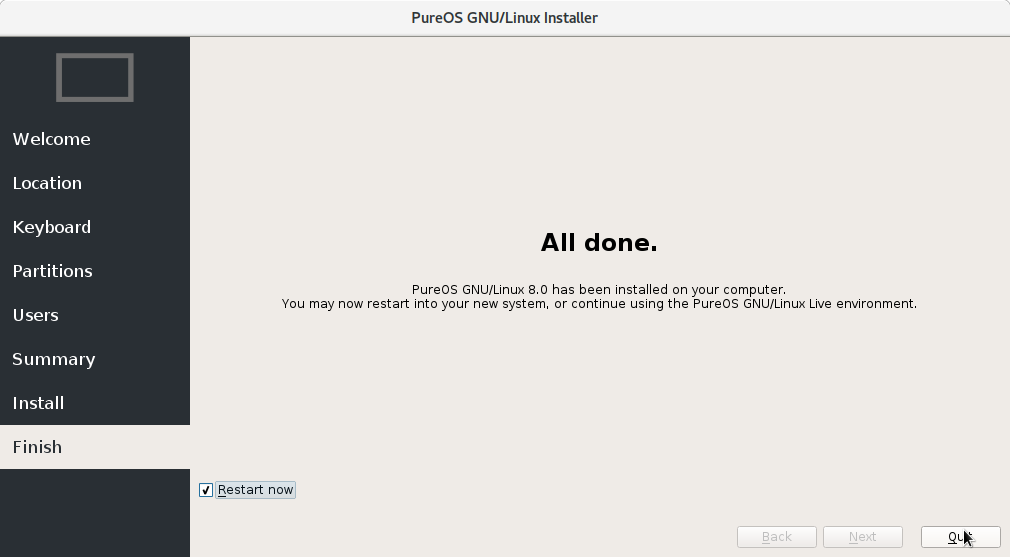
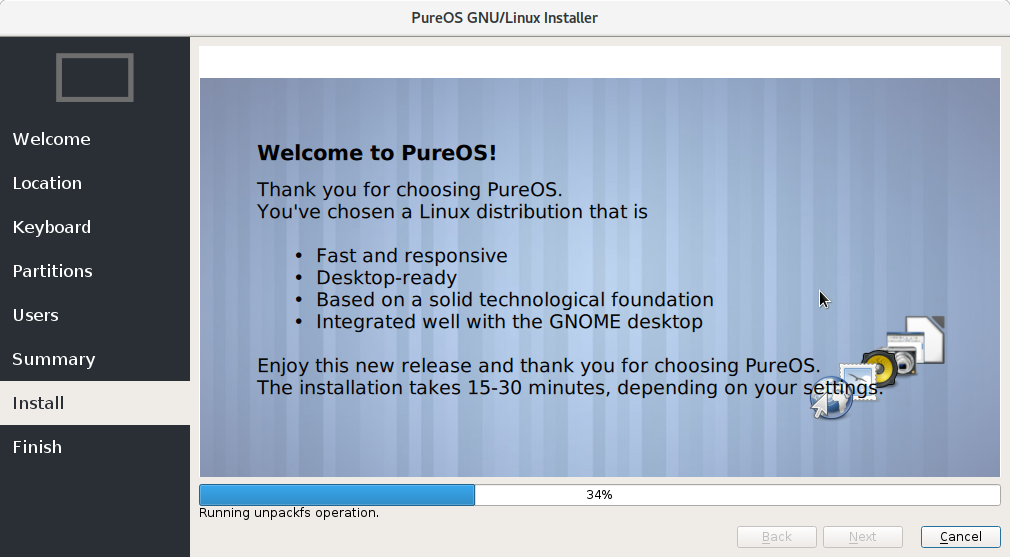
Wait for few minutes:
And restart after it is done.