Settings
The Settings application is where you go to configure and customize your phone. You can also use it to manage your cellular connection and online accounts. This guide will cover some of the more common settings that you may need to adjust.
Locate the icon shown above in the app drawer and press it to launch the application. Alternatively, open the panel at the top of the screen and press the settings (tools) button on the left.
Overview
When you start Settings, you will be shown a list of categories. Press any of these to view and edit the settings for that category.
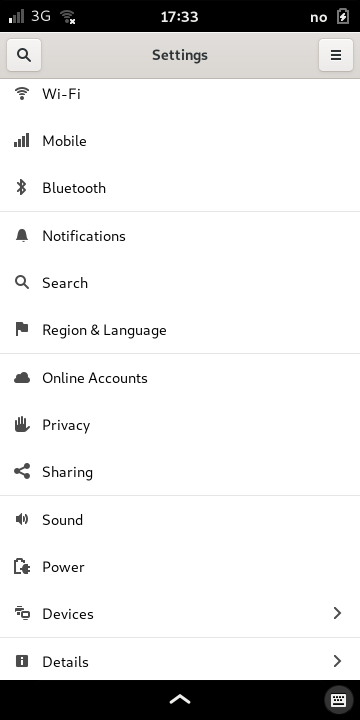
Some categories only appear when the peripheral associated with them is active.
Mobile
The Mobile page is used to configure your phone’s connection to the mobile network. See the Unlock the SIM card section for more information.
Wi-Fi
The Wi-Fi page is used to configure your phone’s connection to local wireless networks. See the Wireless LAN (Wi-Fi) section for more information.
Notifications
The Notifications page is useful when you want to configure how notifications are reported for individual applications and components.
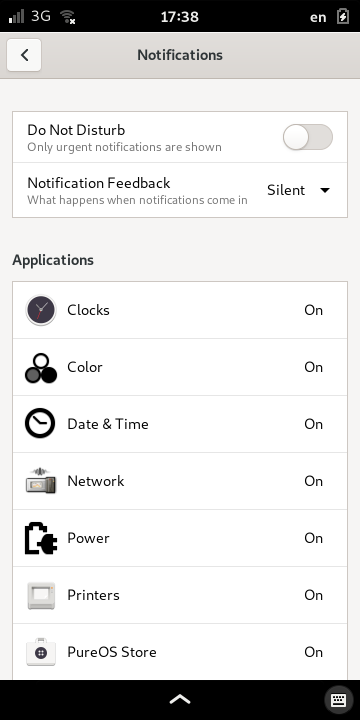
Notifications can be turned off for all applications and services with the Do Not Disturb option.
Press any of the names in the list to open a page showing the preferences for that application or component.
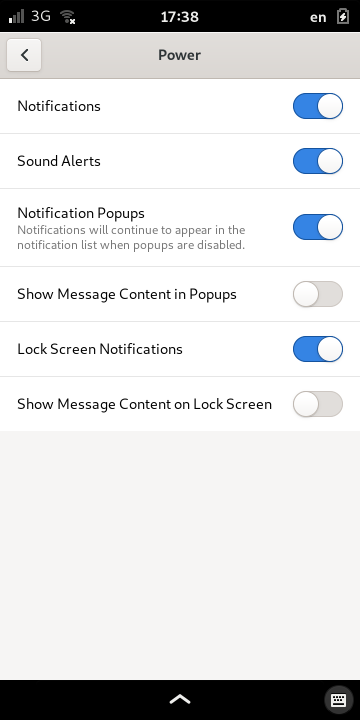
The options shown in the image are as follows:
Notifications – this option allows you to enable or disable delivery of notifications completely for the application.
Sound Alerts will use the system alert sound configured in the Sound settings when enabled. Otherwise, no sounds will be used to alert you to new notifications from the application.
Notification Popups are shown at the top of the screen when a notification is delivered.
Show Message Content in Popups – this option determines whether a summary or a more detailed notification is shown if the application supports it. Only a summary is shown if this is disabled.
Lock Screen Notifications can be shown when the phone is locked and the lock screen is displayed. When enabled, this may result in a message appearing on the lock screen.
Show Message Content on Lock Screen – this option determines whether a summary or a more detailed message is shown in a lock screen notification if the application supports it.
When you have finished fine-tuning the notification settings, press the back button at the top-left of the screen to return to the main Notifications page.
See the Notifications chapter of this guide for background information about notifications and how they are used.
Region & language
The Region & Language page is where you can select the language used for applications and user interface elements. It is also where you can choose the default language for the virtual keyboard.
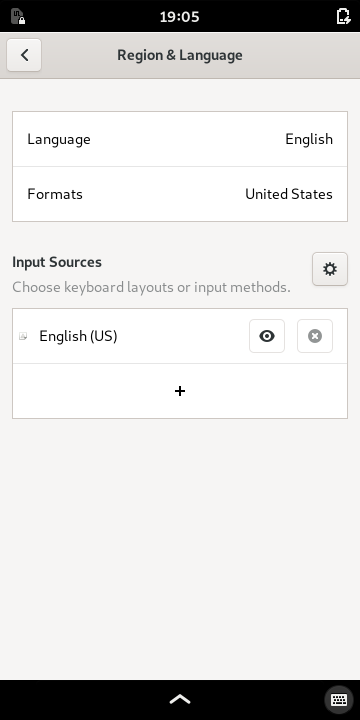
To choose a new default language for the virtual keyboard, press the (add) button below the current language in the Input Sources section.
This opens a dialog that allows you to add an input source – this is where you select another language.

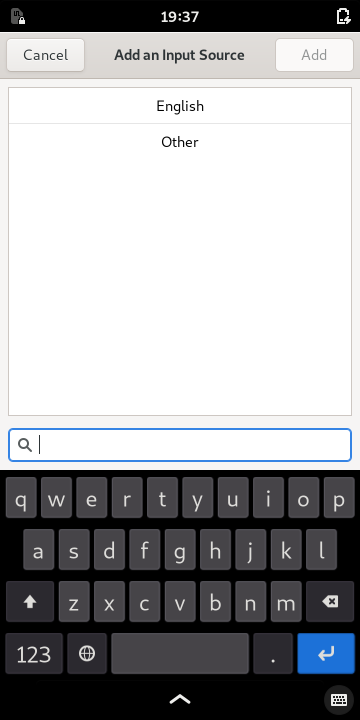
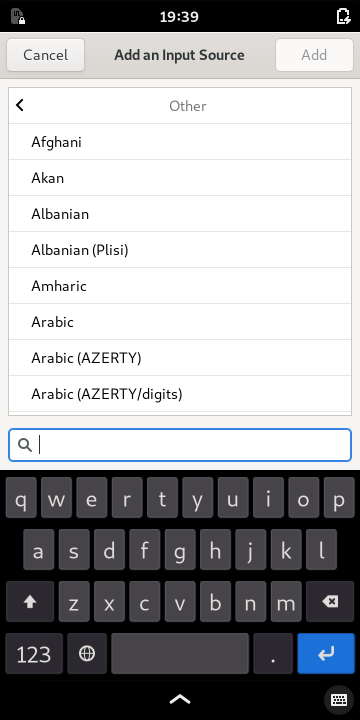
If you are not selecting English as the language, press the (kebab menu) button below the label, then select the Other label that appears.
You can now choose from a language in the list – swipe down to see more languages.
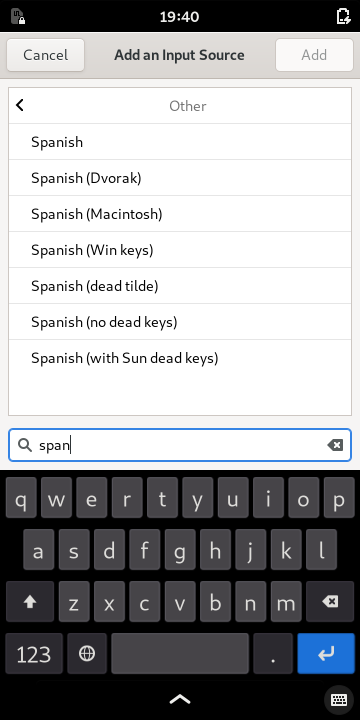
Alternatively, you can start typing with the keyboard to search for the language you want. As you enter the name of a language, the list will show matching languages. We show Spanish as an example in the images below:
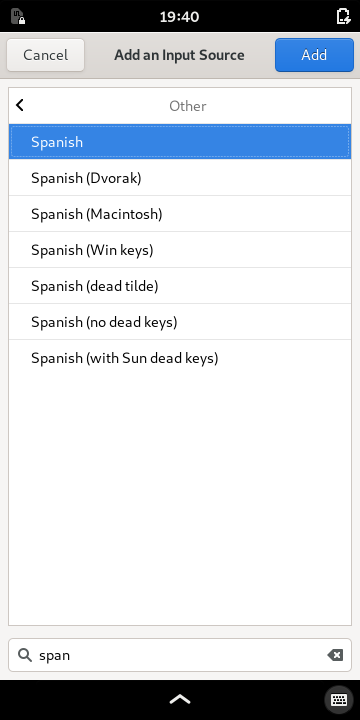
When you have found your language, select it in the list, then press the Add button at the top-right of the screen. Alternatively, press Cancel to return to the Region & Language settings.
If you have selected and added a new language, it will be included in the list of Input Sources.
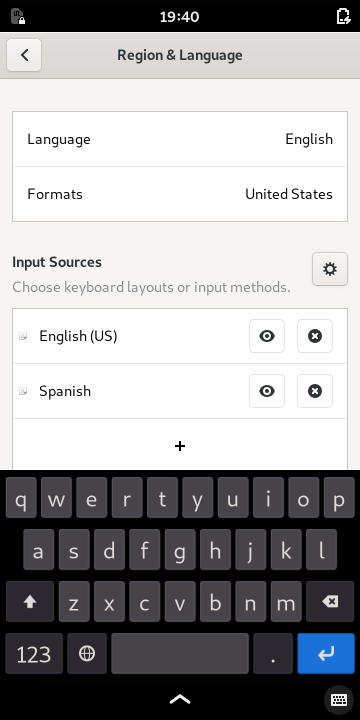
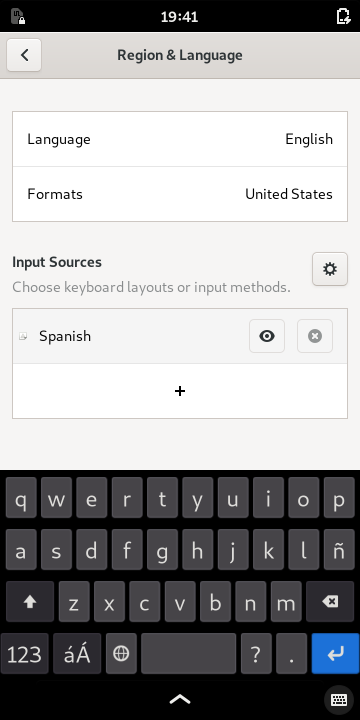
To make the new language the default language for the keyboard, remove the other language by pressing the (delete) button next to its name.
When this happens, the keyboard will change to show a layout that reflects the new default language.
If it is not already shown, press the
button at the bottom-right of the screen to open it.
Note
If the default language does not have a corresponding virtual keyboard layout then the US layout will be used. You can discuss and submit new layouts in the Purism forums.