Librem Mail
Note
For the encryption to work you need to install OpenKeychain app.
Initial configuration
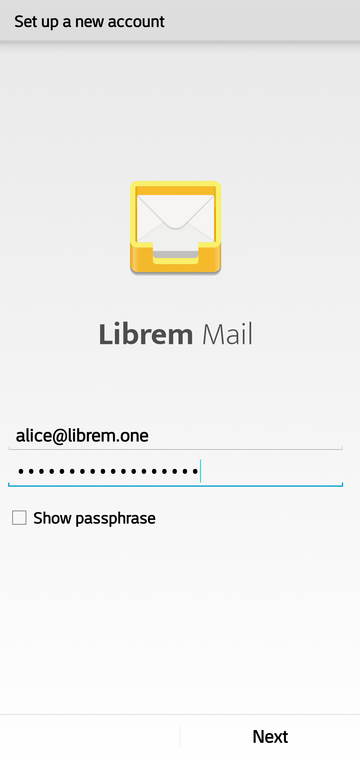
Start Librem Mail and enter your info:
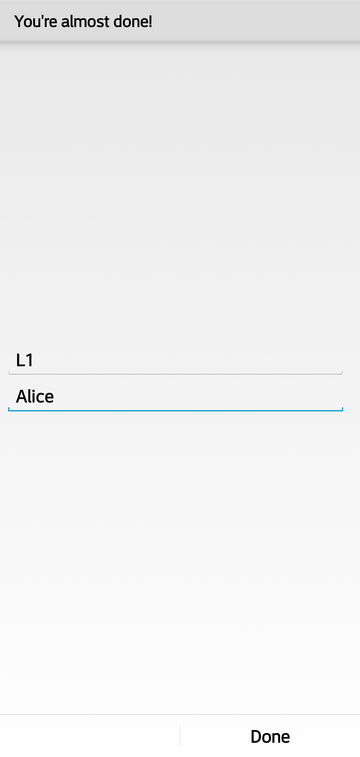
Tap Next and wait until the server info is configured. Next, enter the name of your account (in our example here: L1) and your name (your name will be displayed to people whom you send emails to):
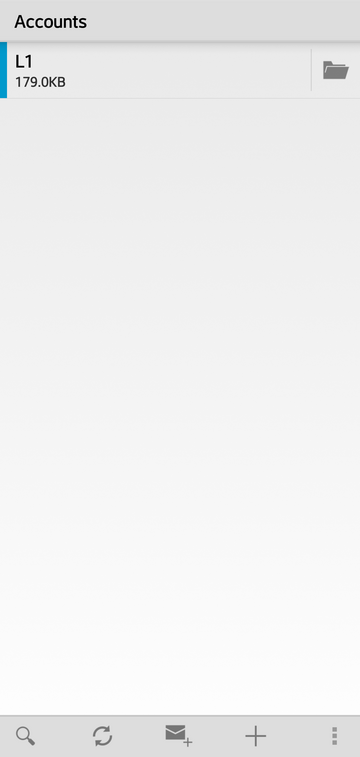
Tap on Done and that’s basically everything you need to do! You have configured Librem One email:

To read your emails, proceed to your inbox (tap on the name of your account which is L1 in our example):

Cleaner display
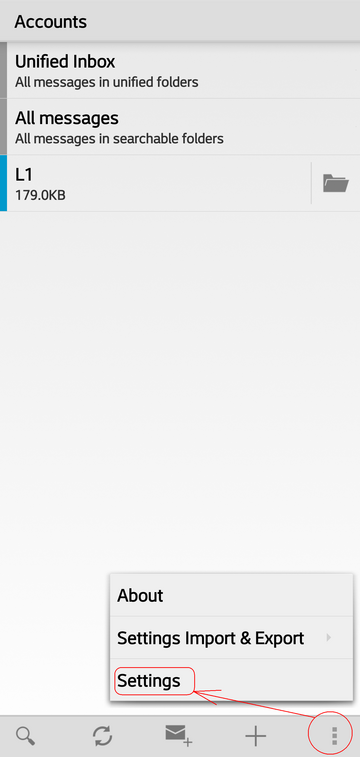
If you have only one Librem One account, you can hide unified inbox. Tap Menu -> Settings:
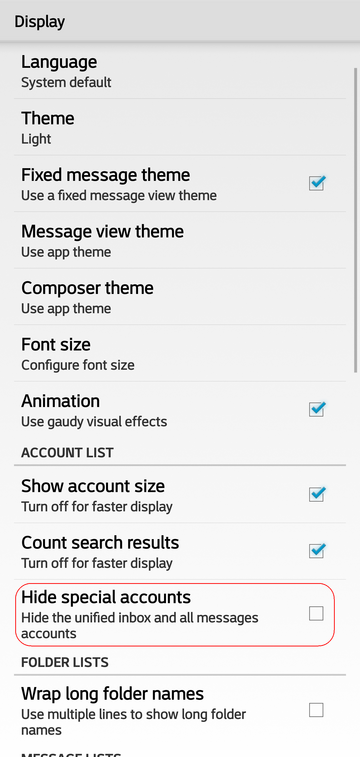
Check the Hide special accounts option:
Looks much cleaner now:
Setting up encryption
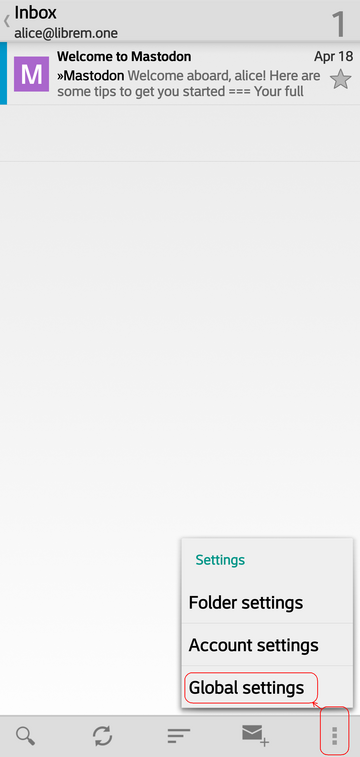
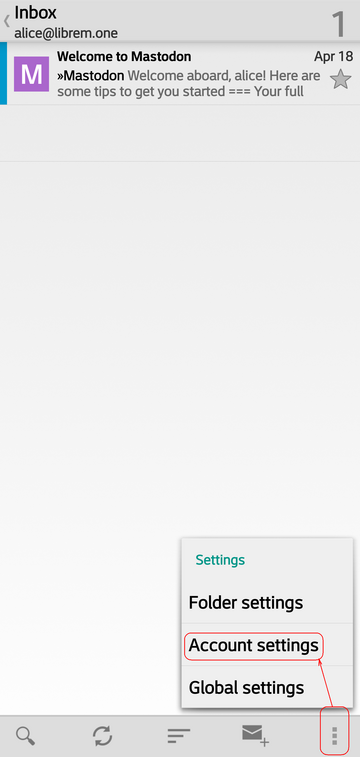
Let’s setup encryption. From your inbox tap Menu -> Global Settings:
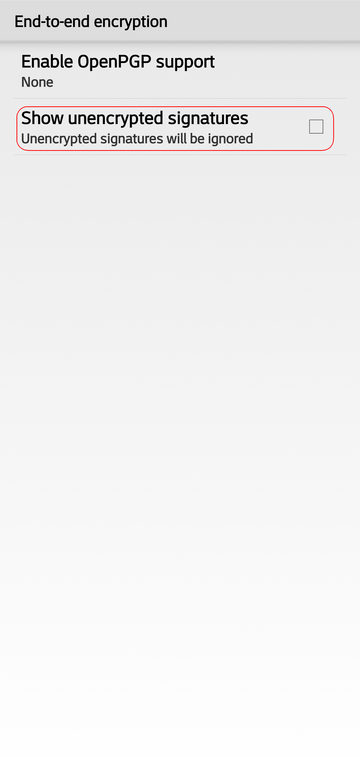
and open End-to-end encryption category. First enable showing unencrypted signatures:
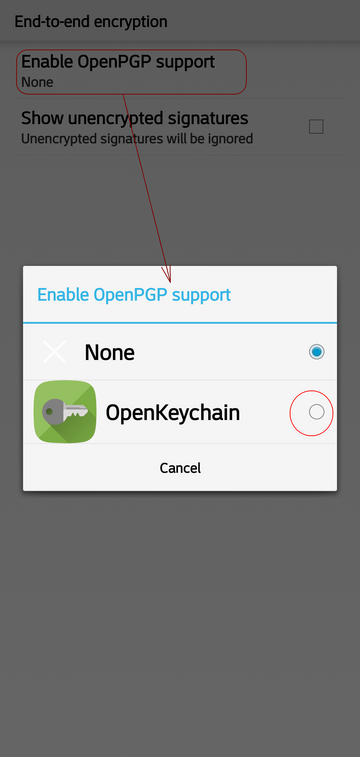
and then tap on OpenPGP support to enable OpenKeychain:
Return back to your inbox, tap Menu -> Account Settings:
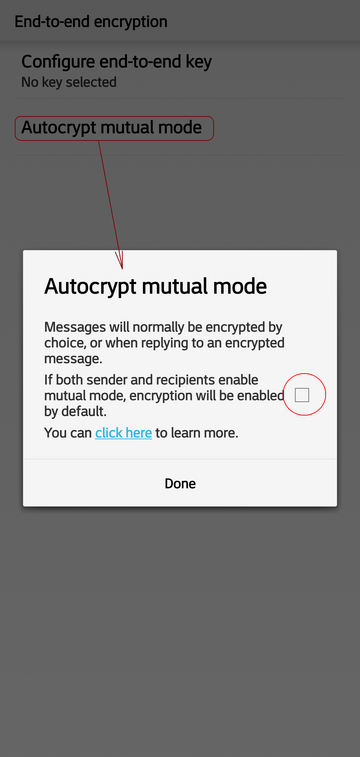
and open End-to-end encryption category. First enable autocrypt mutual mode:
then tap to configure end-to-end encryption key:
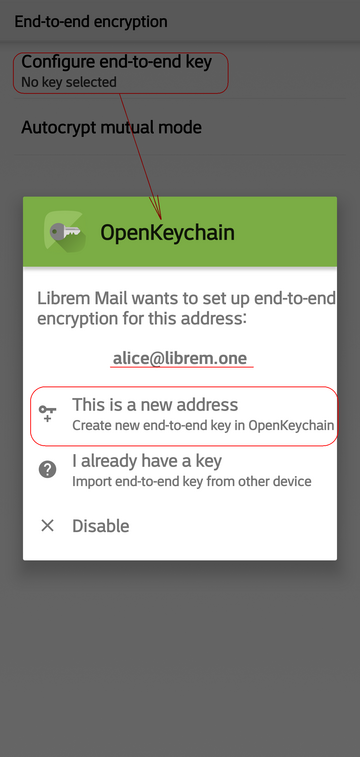
This howto assumes you haven’t configured your key before, so simply tap on This is a new address and a key will be automatically configured for you:
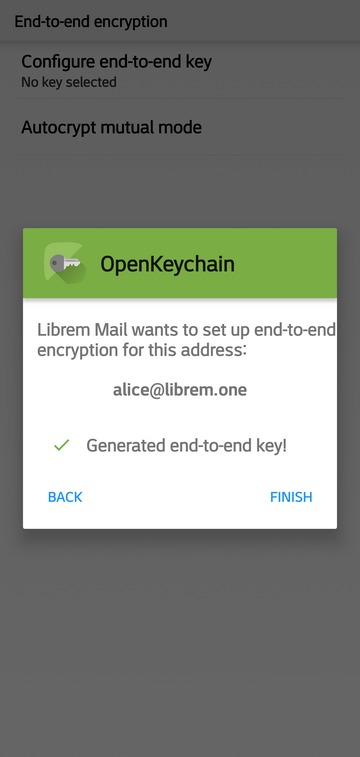
Your key is now configured. Note that it is highly recommended to add password to your key. For this and more options during key creation please refer to our OpenKeychain manual.
Composing an email
Tap on the compose icon:

Enter the address, subject, email text:
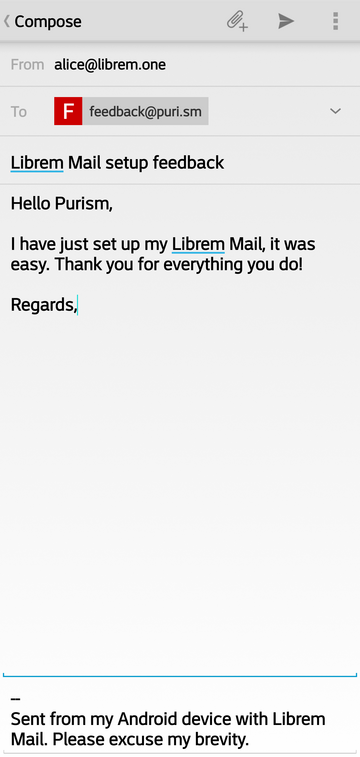
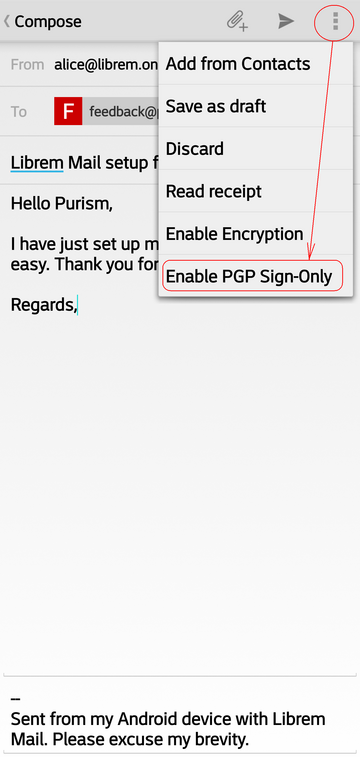
You can add attachments by tapping the paperclip icon. If you have configured your key, it would be a good idea to sign your email. Tap Menu -> Sign-Only to sign this outgoing email with your key:
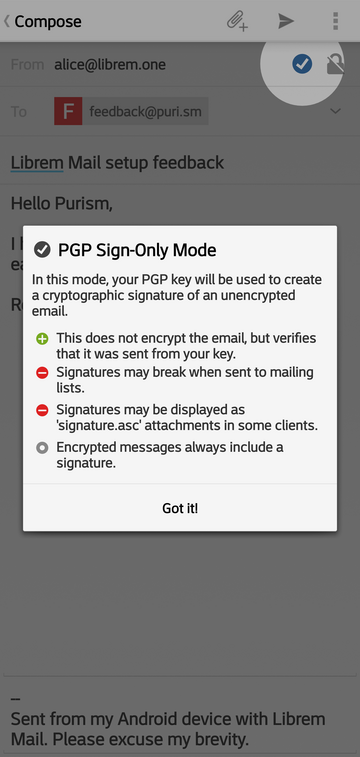
A popup will explain to you what this actually means. Blue checkmark will show up to inform you that this email will be signed:
If you wish to add CC or BCC field, tap the arrow icon (circled in blue). Tap the send icon (circled in red) when you are ready to send your email:

Sharing your public key and initiating encrypted email conversation
Sharing your public key
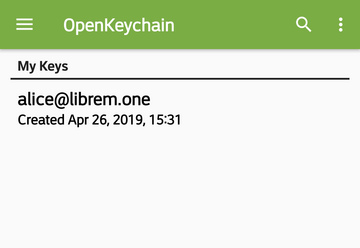
For the encryption to work, you buddy needs your public gpg key. So fire up OpenKeychain and open your newly created key:
Tap the menu icon:
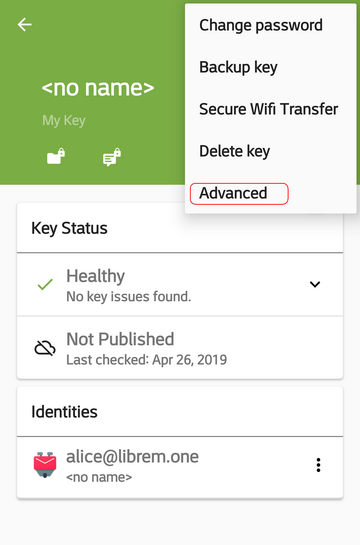
and select Advanced:
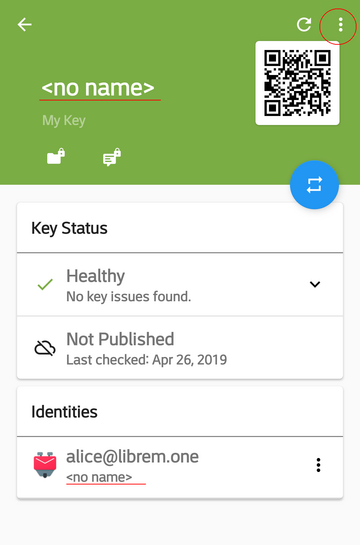
If you are certain you wish everyone to be able to use your public key, you can publish it a webserver (tap the option in light blue). Else, just share it with your friend via email:
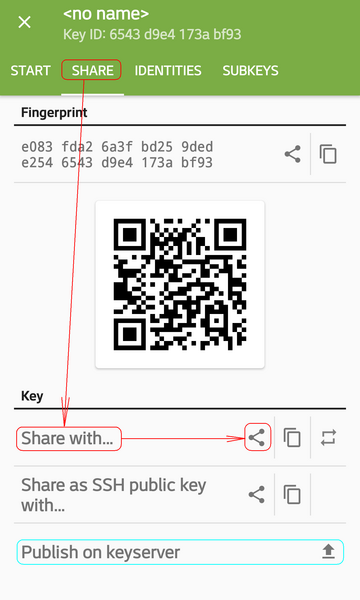
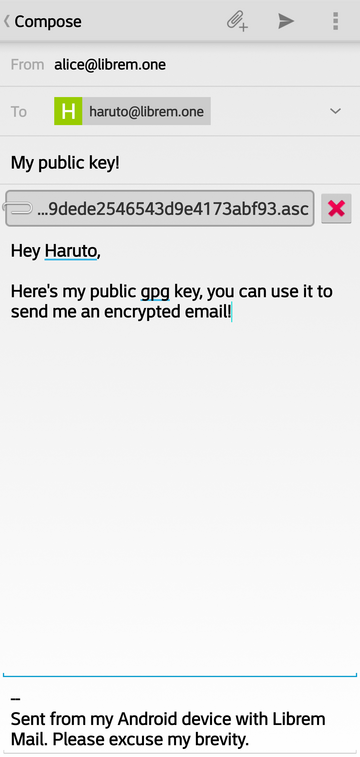
When you select Librem Mail to share your public key, it will automatically be added to a new email. Simply insert your friend’s address and hit Send:
Receiving and replying to encrypted email
Our friend received our email with our key attached, and imported it to his keychain. Now he is able to send us encrypted email:
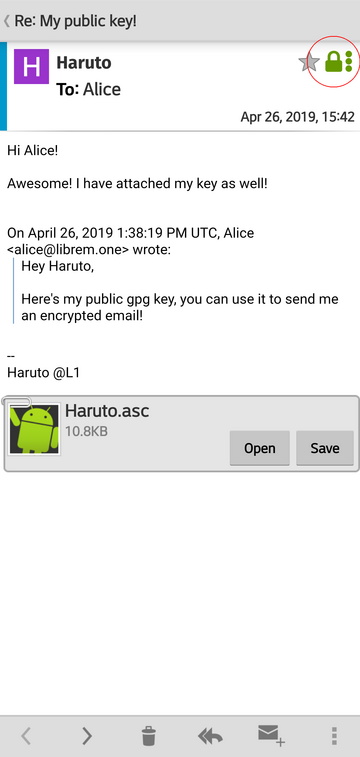
Green padlock icon tells us that this email is indeed encrypted, and only we can read it! Tap the padlock to check this:

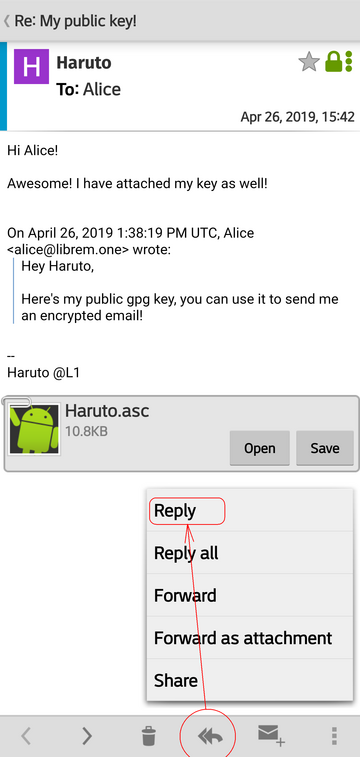
Now let’s reply back. First we need to import Haruto’s key to our keychain:

Then create a reply:
Again, green padlock icon informs us that this email will be encrypted for Haruto, and only he will be able to decrypt it with his key:

Hit send (icon circled in blue) when you finish composing the email.
See also
Head on to Librem Mail and OpenKeychain manuals to see how to fine tune those apps.